Introduction
- This guide assumes you have an approved bot on top.gg and are using either Node.js or Python for your project.
- Next, you will need to create an account on Square Cloud, which can be done through the sign up page. You can use your email to create an account.
- Finally, you need to have an active paid plan on your account. You can view our plans and purchase one according to your needs here.
Setting Up the Environment
- Node.js
- Python
- Before you begin, make sure you have Node.js and npm installed on your system. If you don’t have them yet, you can download them from the official Node.js website.
- Start a new Node.js project with the following command:
Terminal
- Install the necessary libraries:
Terminal
Setting Up the Project
1. Get your webhook authentication:- Go to your Top.gg profile here.
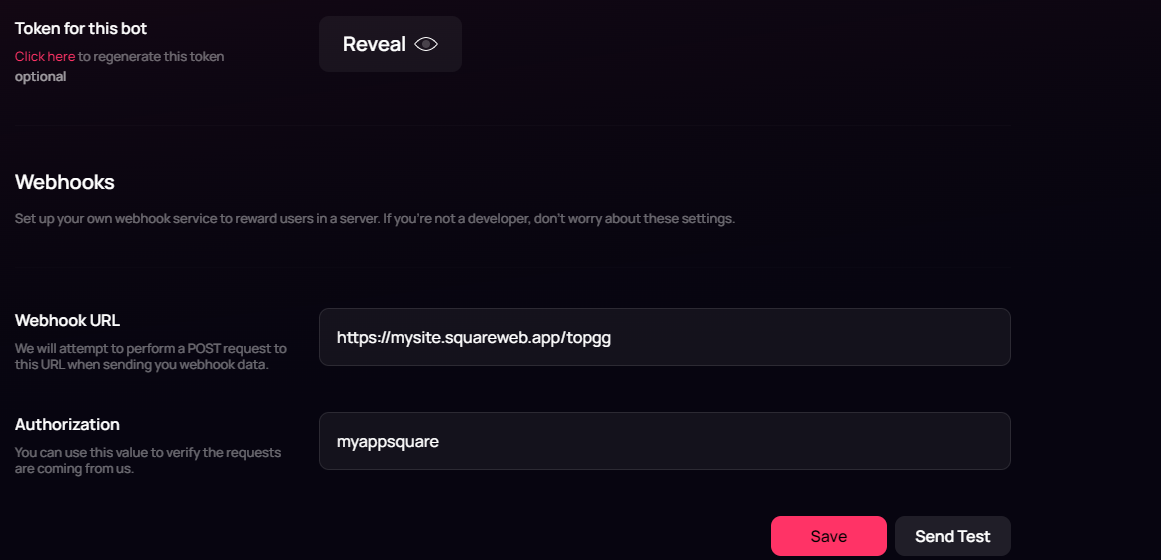
- Click “edit” on the bot you want to receive notifications for votes.
- Under “GENERAL”, choose the “webhook” option.
- Set the webhook authentication in “Authorization”. In this example, we used “myappsquare”.
- Node.js
- Python
We will use the example provided by the top.gg documentation here, with some modifications.
index.js
Creating the squarecloud config file
Learn about: how to make the configuration file for Square Cloud.
The squarecloud.app file is a configuration file that will be used to configure your application; it will be used to define the name, description, version, main file, among other things.
Uploading Your Application to Square Cloud
After following all the steps, put your application files into a.zip file, including the configuration file.
If your application is a Node.js project, take a look at our article on Node.js.
If your application is a Python project, take a look at our article on Python.
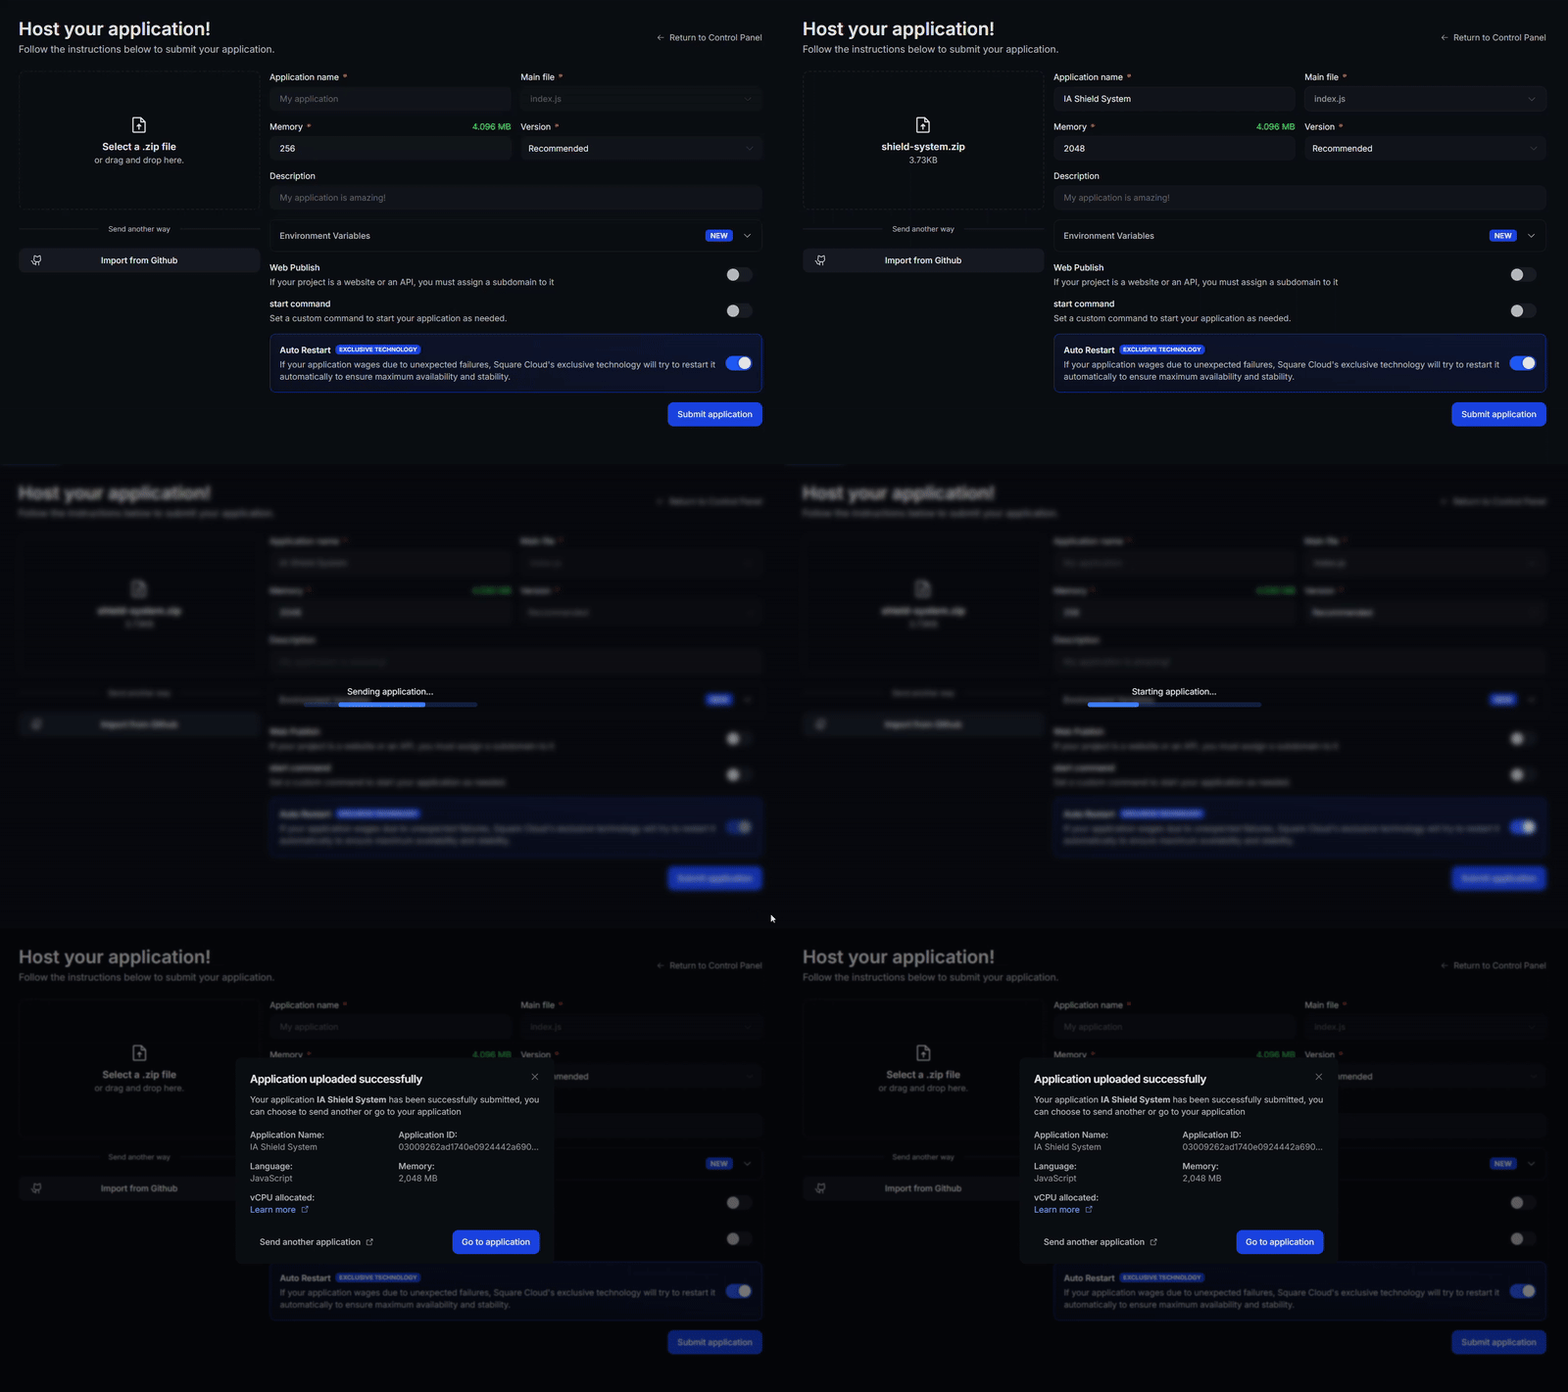
- Dashboard Upload
- CLI Upload
Access the Square Cloud
Dashboard and upload your project
files.

Starting Tests
If you have done everything correctly, try accessing your site using the subdomain defined in the configuration file. If you defined it as “mysite”, to access it will bemysite.squareweb.app. After you access and only “Cannot GET /” or “Method Not Allowed” appears, everything is okay.
Now, you need to go back to the previous page where the authorization was defined. In the Webhook URL field, you should put the URL of your site with the route that will receive the votes.
-
For the JavaScript code we created with
app.post("/topgg", webhook.listener((vote) => {...}), the route that will receive the votes is “/topgg”. So, if your website is “mysite.squareweb.app”, you should put “mysite.squareweb.app/topgg” as the Webhook URL. -
For the Python code we created with
@app.route("/topgg", methods=["POST"]), the route that will receive the votes is also “/topgg”. So, the Webhook URL would be the same “mysite.squareweb.app/topgg”.

console.log or print should appear in the terminal.

Troubleshooting
Custom Domain
To use a custom domain (e.g.,
mysite.com) instead of the default URL mysite.squareweb.app, you need the Standard plan or higher. The subdomain is defined by the SUBDOMAIN field in the configuration file. See: How to set up your custom domain.Minimum RAM Requirements
Minimum: 512MB RAM for simple websites/APIs. For sites with frameworks (Next.JS, React, Vue, Angular, etc.), we always recommend at least 1GB RAM. For larger applications, use more RAM to avoid LACK_OF_RAM error and ensure performance.
Could not find this site.
Check if the subdomain/domain matches what's configured in the SUBDOMAIN field or in the custom domain settings. If you just uploaded the site, wait up to 60 seconds for Square to enable first access.

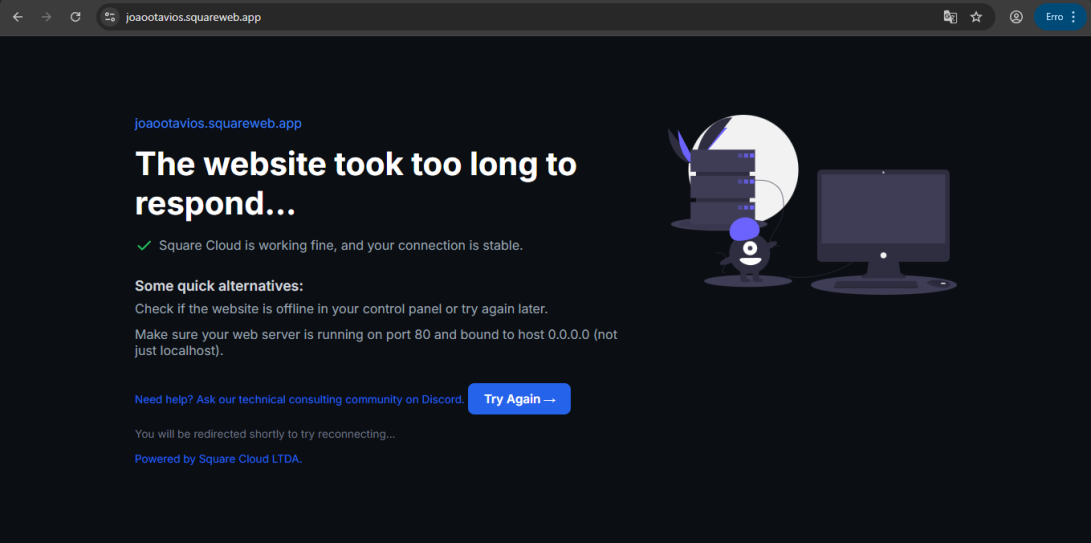
Site took too long to respond...
Check if you correctly configured port 80 and host 0.0.0.0 in the application. We recommend using Square's forced environment variables: PORT and HOST from the 
.env file.

