Introduction
To develop and host on Square Cloud, it’s essential to follow a structured sequence of configurations and prerequisites. This technical guide will cover the entire process, from initial setup to production deployment.Prerequisites
- Square Cloud Account: Register through the signup page using your email.
- Active Paid Plan: Ensures dedicated resources and optimized performance for your application. Check our available plans and choose the most suitable for your needs.
Wondering how much RAM and CPU your plan needs to host X (Twitter)?
Don't worry, we're here to help. Our Hobby plan offers 2GB of RAM and 2vCPU, which should be sufficient for most X (Twitter). However, if you are working on a larger project and seeking extra stability, we recommend considering our Pro plan. With additional resources, you can maintain stability even during demand spikes. To purchase, simply click here.
Don't worry, we're here to help. Our Hobby plan offers 2GB of RAM and 2vCPU, which should be sufficient for most X (Twitter). However, if you are working on a larger project and seeking extra stability, we recommend considering our Pro plan. With additional resources, you can maintain stability even during demand spikes. To purchase, simply click here.
Creating project
An active X (Twitter) account is required for authentication and bot operation. If you don’t have an account, sign up at the official X website.A X Developer account is also required to access the APIs. Request access through the X Developer Portal.
Bot application on X
Accessing the Developer Portal
- Go to the X Developer Portal.
- Log in with your X (Twitter) account.
- If this is your first time, complete the developer access request process.
Project Creation
- In the dashboard, click “Create Project”.
- Choose a name for your project (e.g. “Square Cloud Bot”).
- Select the most appropriate use case (e.g. “Making a bot”).
- Provide a detailed description of your bot.
- Confirm project creation.
Application Setup
- Within the created project, click “Create App”.
- Define a unique name for your application.
- Confirm application creation.
- Note down the generated App ID for future reference.
API Keys Generation
- Navigate to the “Keys and tokens” section of your application.
- In the “Consumer Keys” section, click “Regenerate” to generate:
- API Key (Consumer Key)
- API Secret Key (Consumer Secret)
- Important: Copy and save these keys immediately, as you won’t be able to view them again.
Permissions Configuration
- Go to the “App permissions” section.
- Click “Edit” to modify permissions.
- Select “Read and write” to allow your bot to post tweets.
- If necessary, select “Read and write and Direct message” for DM functionality.
- Save the changes.
Access Tokens Generation
- Return to the “Keys and tokens” section.
- In the “Access Token and Secret” section, click “Generate”.
- Confirm token generation.
- Copy and save:
- Access Token
- Access Token Secret
- Warning: These tokens cannot be viewed again after closing the page.
Developing project
- Node.js check: Verify that Node.js is installed on your system. If not, download it from the official Node.js website.
- Project initialization: Create a new Node.js project by running:
Terminal
- Install dependencies: Install the libraries required for the bot:
Terminal
- Environment variables setup: Create a
.envfile to store your credentials securely:
.env
- Create the main file: Develop the
index.jsfile with the bot’s base structure:
index.js
Deploying
After preparing your project files, you can now upload them to Square Cloud and host your project. To do so, create a ZIP file containing all your project files.Environment Variables
Environment Variables
Security: Never include your API credentials directly in code. Always use environment variables on Square Cloud.
API_KEY: Your X API keyAPI_SECRET_KEY: Your X API secret keyACCESS_TOKEN: Your access tokenACCESS_TOKEN_SECRET: Your access token secret
Via dashboard
Access the Upload Page
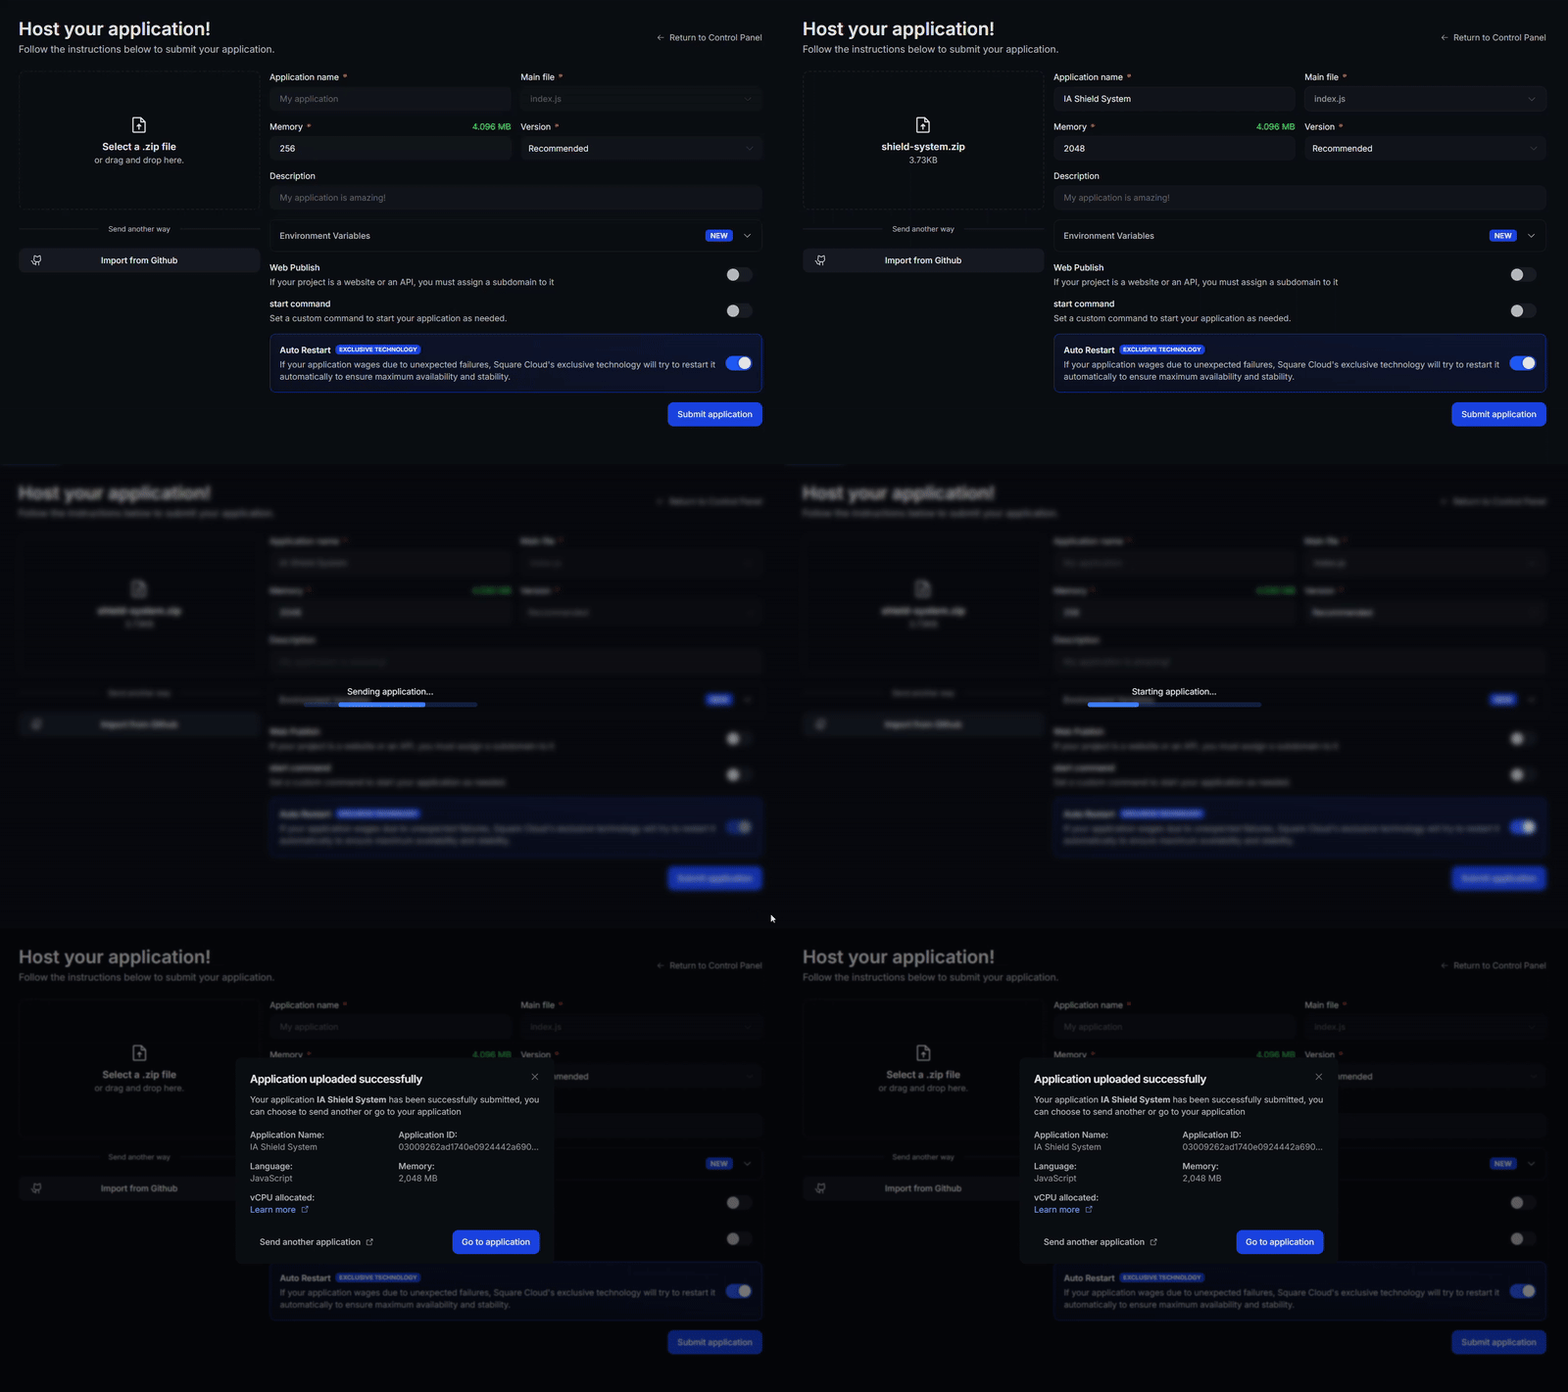
Access the upload page and upload your project zip file.
Configure Your Environment
After uploading your zip, you will need to configure the name, main file or runtime environment and other settings for your project.
If you are uploading a web project, make sure to select "Web Publication" and set a subdomain to your project.
If you are uploading a web project, make sure to select "Web Publication" and set a subdomain to your project.
Via CLI
To use this method, you need to create a config file namedsquarecloud.app in the root directory of your project. This file will contain the necessary configuration for your project.
Learn more about: how to create the configuration file for Square Cloud.
The squarecloud.app file is a configuration file that will be used to configure your application; it will be used to define your environment.
Install the CLI
First, you need to have the CLI installed in your environment. If you don't have it yet, run the following command in your terminal:If you already have it, we recommend updating it. To do this, run the following command in your terminal:
- Windows
- Linux, macOS, and WSL
Authenticate
Now, to authenticate and use other CLI commands, you will find your authorization key here by clicking on "Request API Key". After obtaining your authorization key, run the following command:


