

はじめに
Square Cloud で X (Twitter) ボット を開発してホストするには、構成と前提条件の体系的な手順に従うことが不可欠です。この技術ガイドでは、初期セットアップから本番環境へのデプロイまで、プロセス全体を解説します。前提条件
- Square Cloud アカウント: 登録ページからメールアドレスを使って登録します。
- 有効なプラン: アプリケーションに専用リソースと最適化されたパフォーマンスを提供します。利用可能なプランを確認し、ニーズに最も適したものを選択してください。
プロジェクトの作成
認証とボットの動作には、アクティブな X (Twitter) アカウントが必要です。アカウントをお持ちでない場合は、X 公式サイトで登録してください。API にアクセスするには、X Developer アカウントも必要です。X Developer Portal からアクセスをリクエストしてください。
X 上でのボットアプリケーション
1
Developer Portal を開く
- X Developer Portal にアクセスします。
- X (Twitter) アカウントでログインします。
- 初めての場合は、開発者アクセスのリクエスト手続きを完了してください。
2
プロジェクトを作成する
- ダッシュボードで「Create Project」をクリックします。
- プロジェクトの名前を選びます(例: 「Square Cloud Bot」)。
- 最も適切なユースケースを選択します(例: 「Making a bot」)。
- ボットの詳細な説明を入力します。
- プロジェクトの作成を確定します。
3
アプリを作成する
- 作成したプロジェクト内で「Create App」をクリックします。
- アプリケーションに一意の名前を定義します。
- アプリケーションの作成を確定します。
- 生成された App ID を今後の参照用に記録しておきます。
4
API キーを生成する
- アプリケーションの「Keys and tokens」セクションに移動します。
- 「Consumer Keys」セクションで「Regenerate」をクリックして、以下を生成します:
- API Key (Consumer Key)
- API Secret Key (Consumer Secret)
- 重要: これらのキーは再表示できないため、すぐにコピーして保存してください。
5
アプリの権限を設定する
- 「App permissions」セクションに移動します。
- 「Edit」をクリックして権限を変更します。
- ボットがツイートを投稿できるように「Read and write」を選択します。
- 必要に応じて、DM 機能のために「Read and write and Direct message」を選択します。
- 変更を保存します。
6
アクセストークンを生成する
- 「Keys and tokens」セクションに戻ります。
- 「Access Token and Secret」セクションで「Generate」をクリックします。
- トークンの生成を確定します。
- 以下をコピーして保存します:
- Access Token
- Access Token Secret
- 警告: これらのトークンはページを閉じた後は再表示できません。
7
認証情報を確認する
- 必要な 4 つの認証情報がすべて揃っていることを確認します:
- API Key (Consumer Key)
- API Secret Key (Consumer Secret)
- Access Token
- Access Token Secret
- これらの認証情報を安全な場所に保管します
- 重要: これらの認証情報を公開したり共有したりしないでください
ボットの開発
- Node.js の確認: Node.js がシステムにインストールされていることを確認してください。ない場合は、Node.js 公式サイトからダウンロードしてください。
- プロジェクトの初期化: 次のコマンドを実行して、新しい Node.js プロジェクトを作成します:
Terminal
- 依存関係のインストール: ボットに必要なライブラリをインストールします:
Terminal
- 認証情報: コードは 4 つの認証情報を環境変数から読み込むため、認証情報がコードに入ることはありません。手元のコンピューターでボットをテストするには、認証情報を
.envファイルに入れ、node --env-file=.env index.jsでボットを起動します。
.env
- メインファイルの作成: ボットの基本構造を含む
index.jsファイルを作成します:
index.js
Square Cloud の設定
プロジェクトのルートに、index.js と並べて squarecloud.app ファイルを作成します。このファイルは、ボットの実行方法を Square Cloud に伝えます。
squarecloud.app
MEMORYはボットの RAM (MB) です。ボットには最低 256 MB が必要で、512 MB あれば成長の余地があります。AUTORESTART=trueを指定すると、ボットがクラッシュしたときに再起動します。自動再起動の仕組みを参照してください。SUBDOMAINはありません。ボットは X API を呼び出すだけで、ウェブページを配信しないためです。
認証情報の設定
セキュリティ: API 認証情報をコードに直接記述しないでください。Square Cloud では必ず環境変数を使用してください。
API_KEY: あなたの X API キーAPI_SECRET_KEY: あなたの X API シークレットキーACCESS_TOKEN: あなたのアクセストークンACCESS_TOKEN_SECRET: あなたのアクセストークンシークレット
- ダッシュボード: アップロードページで 詳細設定 を開き、4 つの変数を追加します。すでにデプロイ済みのボットの場合は、アプリケーションの 環境変数 ページで追加し、ボットを再起動します。
- CLI: ボットをアップロードした直後に (デプロイと動作確認を参照)、
squarecloud app env setでローカルの.envファイルから読み込み、ボットを再起動します。
ZIP に含めるもの
index.jsと、その他のソースファイル。package.json。squarecloud.app。
node_modules は含めないでください。依存関係はボットの起動時に Square Cloud がインストールします。.env ファイルも含めないでください。CLI でアップロードする場合は、CLI がスキップするように squarecloud.ignore ファイルに .env の行を追加します。
デプロイと動作確認
上で説明した ZIP を作成し、アップロードします。ダッシュボード経由
1
アップロードページにアクセス
アップロードページにアクセスし、プロジェクトの zip ファイルをアップロードします。
2
環境を設定
zip をアップロードした後、プロジェクトの名前、メインファイルまたはランタイム環境、その他の設定を構成する必要があります。
ウェブプロジェクトをアップロードする場合は、必ず「Web Publication」を選択し、プロジェクトにサブドメインを設定してください。
ウェブプロジェクトをアップロードする場合は、必ず「Web Publication」を選択し、プロジェクトにサブドメインを設定してください。
3
プロジェクトをデプロイ
最後に「Deploy」ボタンをクリックして、プロジェクトを Square Cloud にホストします。
デプロイ後、ダッシュボードからプロジェクトのステータスとログを監視できます。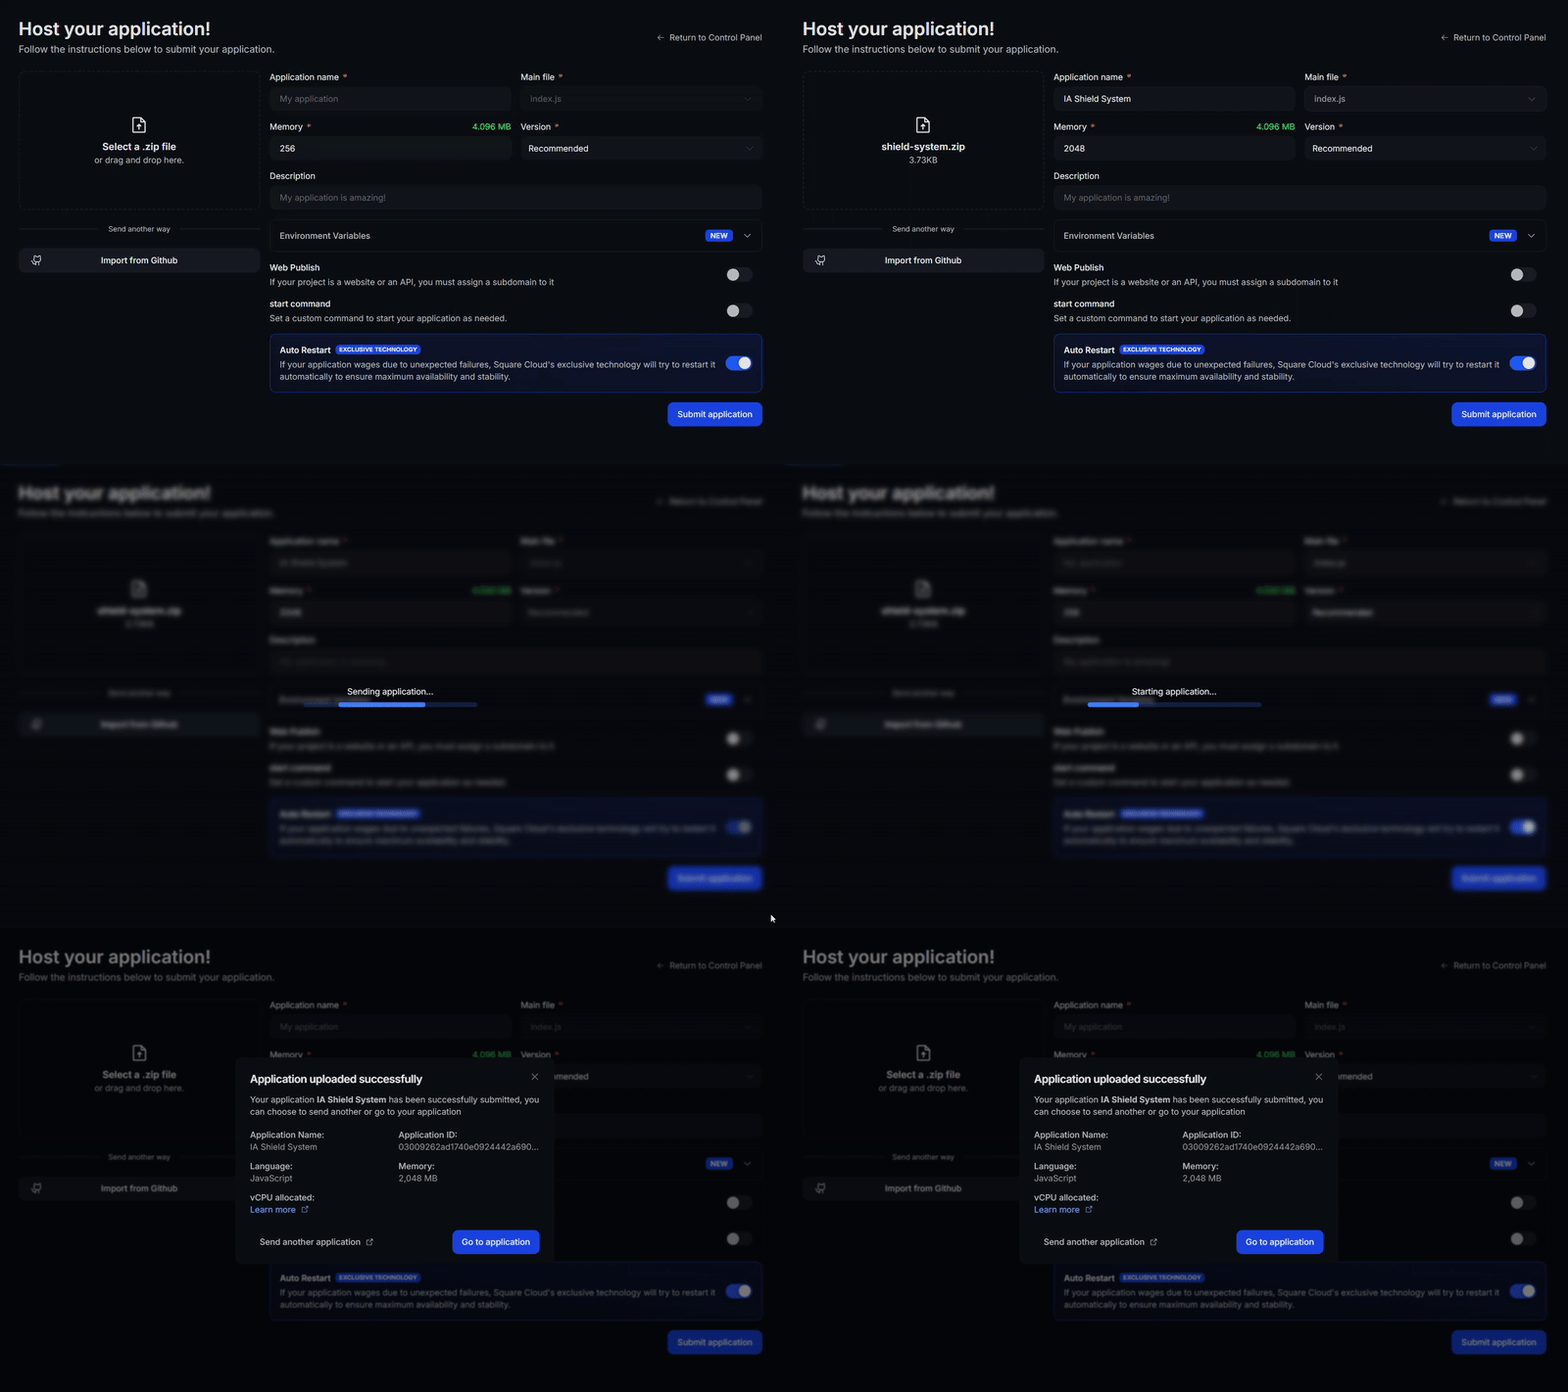
デプロイ後、ダッシュボードからプロジェクトのステータスとログを監視できます。
4
アプリが稼働していることを確認
最初のデプロイは、通常 1 分もかからずに完了します。ダッシュボードでアプリケーションのステータスが running になるのを待ち、起動時のエラーがないかログを確認してください。
ウェブサイトや API をデプロイした場合は、ブラウザで
ウェブサイトや API をデプロイした場合は、ブラウザで
https://<your-subdomain>.squareweb.app を開き、アプリケーションが応答することを確認してください。ボットをデプロイした場合は、コマンドを送信してオンラインになっていることを確認してください。
CLI 経由
この方法を使用するには、プロジェクトのルートにsquarecloud.app という名前の設定ファイルが必要です。このファイルは、アプリケーションの実行方法を Square Cloud に伝えます。
設定ファイルガイド
アプリケーションの環境を定義する
squarecloud.app 設定ファイルの作成方法を学びます。1
CLI をインストール
Square Cloud CLI をインストールします。すでにお持ちの場合は、同じコマンドを実行すると更新されます:
2
ログイン
次のコマンドを実行します。ブラウザが開くので、そこでログインを承認すれば CLI の準備は完了です。API キーをコピーする必要はありません。スクリプトや CI については、CLI の認証を参照してください。
3
プロジェクトをアップロード
プロジェクトのフォルダで次のコマンドを実行します。CLI は 自分で作成した zip をアップロードするには、
squarecloud.ignore に記載されたものを除いて現在のフォルダを zip にし、アップロードします:--file で指定します:4
アプリが稼働していることを確認
最初のデプロイは、通常 1 分もかからずに完了します。ターミナルから直接、アプリケーションのステータスとログを確認してください。ウェブサイトや API をデプロイした場合は、ブラウザで
https://<your-subdomain>.squareweb.app を開き、アプリケーションが応答することを確認してください。ボットをデプロイした場合は、コマンドを送信してオンラインになっていることを確認してください。
ボットのテスト
デプロイ後、Square Cloud ダッシュボードでアプリケーションのログを確認し、Bot successfully initialized! メッセージが表示されてボットが正しく認証されたことを確認してください。次に、別のアカウントから !ping を含めてボットをメンションするツイートを投稿し (例: @your_bot !ping)、数分以内に X 上で Pong! 🤖 X Bot working correctly! と返信されることを確認してください。ボットの起動前に投稿されたメンションはスキップされます。
よくあるエラー
Request failed with code 401
ログにError verifying bot: に続いてこのエラーが表示されます。4 つの認証情報のいずれかが間違っているか、不足しています。「Keys and tokens」セクションから改めてコピーし、4 つの変数を設定してボットを再起動してください。
返信時に Request failed with code 403
ボットは認証されますが、投稿できません。アクセストークンが、アプリが読み取り専用の権限だったときに生成されています。アプリの権限で「Read and write」を設定し、Access Token と Secret を再生成して、ACCESS_TOKEN と ACCESS_TOKEN_SECRET を更新し、ボットを再起動してください。
Request failed with code 429
ボットが X API のレート制限に達しました。次のリクエストまで待ち、レート制限のように呼び出しの間隔を空けてください。さらに活用する
以下のスニペットはindex.js を拡張するものです。ファイルに追加し、ボットで必要な場所から呼び出してください。
ハッシュタグの監視
投稿のスケジュール設定
レート制限
X (Twitter) には厳格なレート制限があります。これらの制限を超えないように制御を実装してください:エラー処理
次のステップ
アプリが起動しない
モジュールの不足、メモリエラーなどの起動エラーを修正します。
環境変数
ボットの認証情報やその他のシークレットを管理します。
Node.js ランタイム
Square Cloud が Node.js アプリケーションを実行する仕組み。