

Before you begin
Square Cloud is a paid platform: an active plan is required to deploy, so your project runs on production-grade infrastructure from day one. Create your account, then select the plan that’s right for you (see what each plan includes).Sign Up
If you’ve never used Square before, sign up to get started.
Log in
If you already have an account, log in to get started.
Create the project
Create a folder with these three files.1
Write the app
index.js answers every request with a short message. It reads the port and host from the PORT and HOST environment variables, which Square Cloud sets to 80 and 0.0.0.0:index.js
2
List the dependencies
Every Node.js project needs a
package.json: Square Cloud installs the packages it lists before starting your app. This example has none, but the file must exist and can’t be empty.package.json
3
Add the configuration file
squarecloud.app tells Square Cloud which file to run, how much memory to reserve and which runtime version to use. SUBDOMAIN publishes the app as a website at https://<subdomain>.squareweb.app, so pick a name nobody has taken yet.squarecloud.app
Zip the project
Deploying with the CLI? Skip this section:squarecloud upload zips the folder for you.
1
Select the files, not the folder
Open the project folder and select everything inside it.
squarecloud.app must sit at the top level of the zip: if you compress the folder itself, the files end up inside a subfolder and the deploy fails with MISSING_CONFIG.2
Create the zip
- Windows
- macOS
- Linux
Right-click the selected files and choose Compress to ZIP file (Windows 11) or Send to → Compressed (zipped) folder.
3
Check the size
The zip can be up to 100 MB. Leave out
node_modules, virtual environments and build caches: dependencies are installed on the server, and those folders are deleted on deploy anyway.Deploy
Upload the zip in the dashboard, or deploy with one command from the CLI.Via dashboard
1
Access the Upload Page
Access the upload page and upload your project zip file.
2
Configure Your Environment
After uploading your zip, you will need to configure the name, main file or runtime environment and other settings for your project.
If you are uploading a web project, make sure to select “Web Publication” and set a subdomain to your project.
If you are uploading a web project, make sure to select “Web Publication” and set a subdomain to your project.
3
Deploy Your Project
Finally, click on the “Deploy” button to host your project on Square Cloud.
After deployment, you can monitor your project’s status and logs from the dashboard.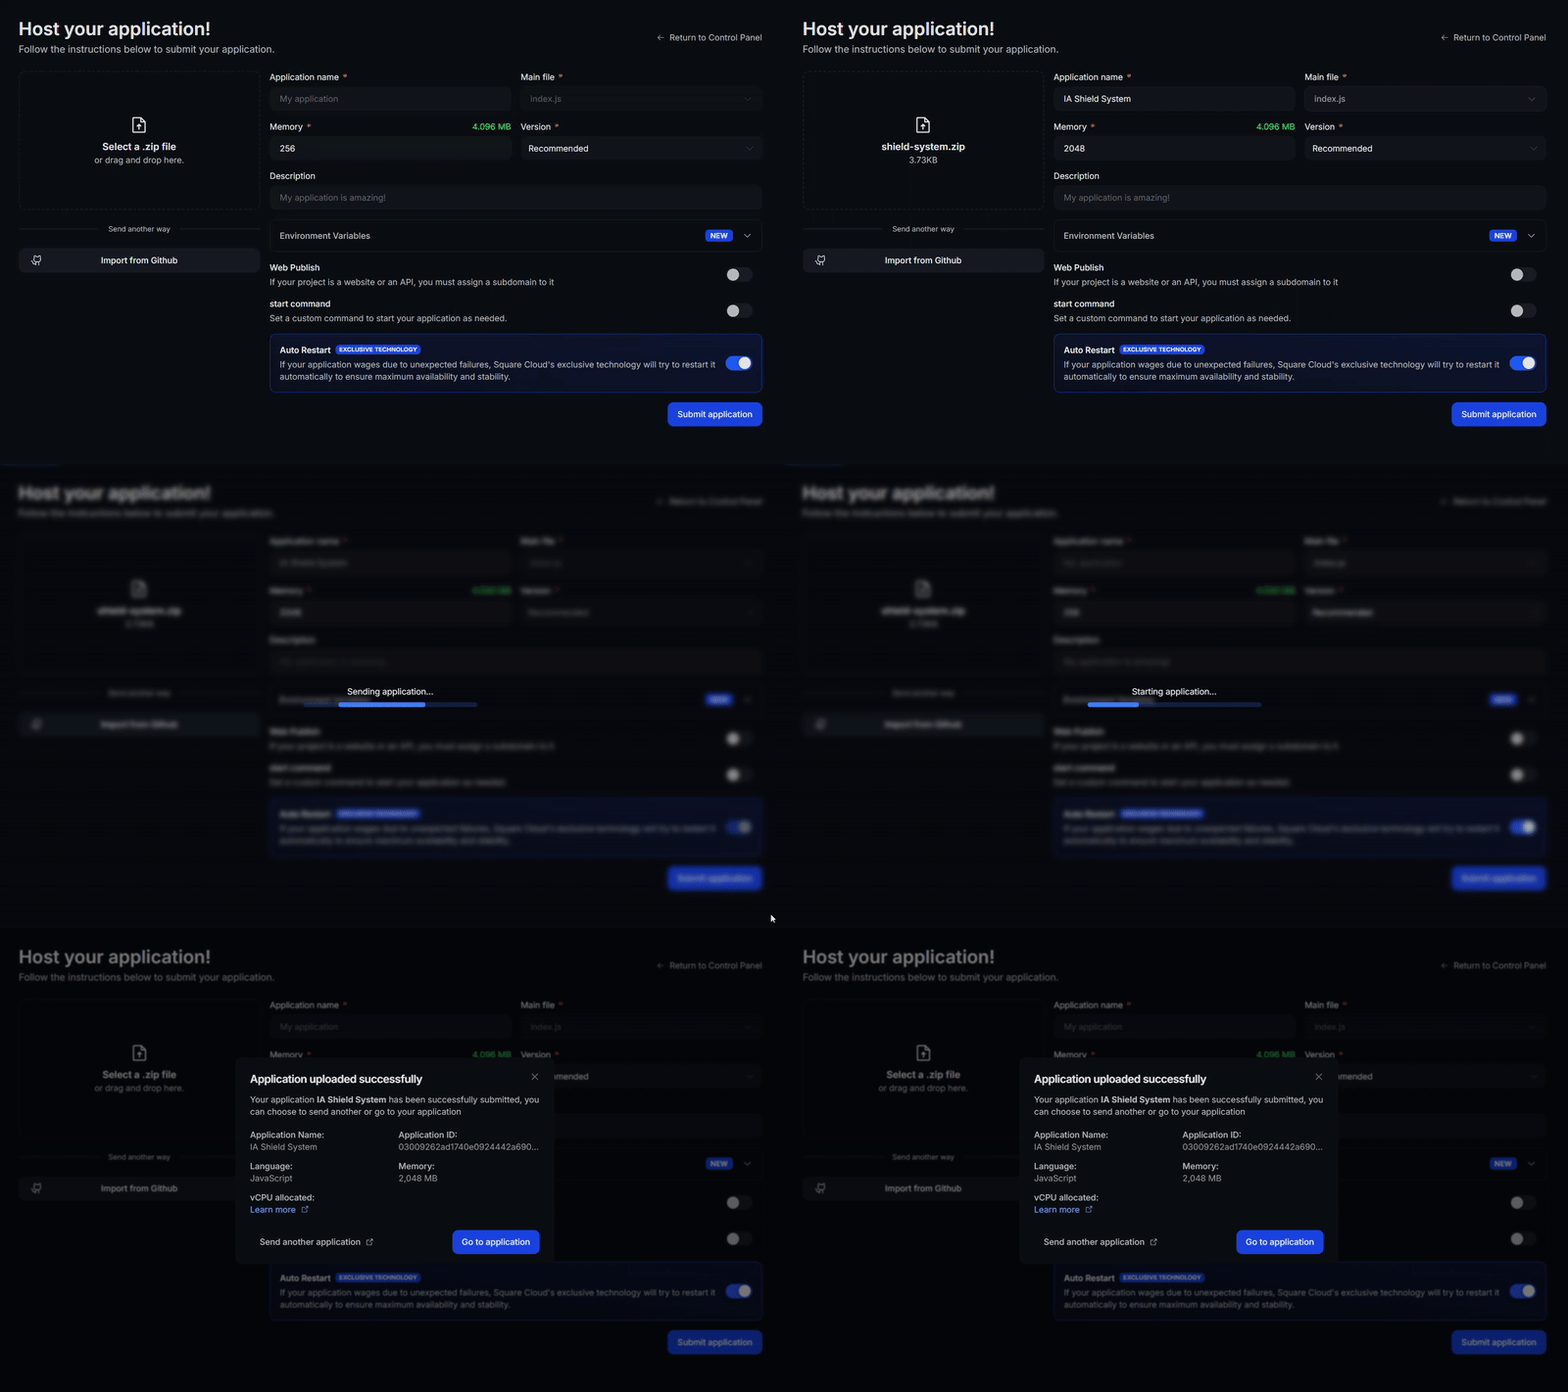
After deployment, you can monitor your project’s status and logs from the dashboard.
4
Confirm Your App Is Live
Your first deploy usually takes less than a minute. In the dashboard, wait for your application status to show as running and check the logs for any startup errors.
If you deployed a website or API, open
If you deployed a website or API, open
https://<your-subdomain>.squareweb.app in your browser: you should see your application responding. If you deployed a bot, send it a command to confirm it is online.
Via CLI
To use this method, your project needs a configuration file namedsquarecloud.app at its root. It tells Square Cloud how to run your application.
Configuration file guide
Learn how to create the
squarecloud.app configuration file that defines your application’s environment.1
Install the CLI
Install the Square Cloud CLI. If you already have it, run the same command to update it:
2
Log In
Run the command below. It opens your browser: approve the login there and the CLI is ready. There is no API key to copy. For scripts and CI, see CLI authentication.
3
Upload Your Project
From your project folder, run the command below. The CLI zips the current folder, leaving out what To upload a zip you created yourself, pass it with
squarecloud.ignore lists, and uploads it:--file:4
Confirm Your App Is Live
Your first deploy usually takes less than a minute. Check your application status and logs directly from the terminal:If you deployed a website or API, open
https://<your-subdomain>.squareweb.app in your browser: you should see your application responding. If you deployed a bot, send it a command to confirm it is online.
https://hello-square-yourname.squareweb.app (with your subdomain) answers Hello from Square Cloud!.
Next steps
Configuration file
Every
squarecloud.app field: memory, start command, subdomain and automatic restarts.Environment variables
Store tokens and connection strings outside your code.
Troubleshooting
Fix upload errors, sites that don’t load and apps that won’t start.
VS Code extension
Upload, commit and follow logs without leaving your editor.