> ## Documentation Index
> Fetch the complete documentation index at: https://docs.squarecloud.app/llms.txt
> Use this file to discover all available pages before exploring further.
# Telegram ボットをホストする方法
> Square Cloud で Telegram ボットを作成しホストする方法を学びます。設定、デプロイ、そして Node.js と Python の実践的なサンプルを含む完全なチュートリアルです。
export const RecommendedPlan = ({lang, plan, tier, cpu, appType}) => {
const url = `https://squarecloud.app/${lang}/pay?plan=${plan.toLowerCase()}&tier=${tier}`;
if (lang == 'en') {
return
Wondering how much RAM and CPU your plan needs to host {appType}?
Don't worry, we're here to help.
Our {plan} plan offers {tier}GB of RAM and {cpu}vCPU, which should be sufficient for most {appType}.
However, if you are working on a larger project and seeking extra stability, we recommend considering our Pro plan. With additional resources, you can maintain stability even during demand spikes.
To purchase, simply click here.
;
} else {
return
Está se perguntando quanta RAM e CPU seu plano precisa para hospedar {appType}?
Não se preocupe, estamos aqui para ajudar.
Nosso plano {plan} oferece {tier}GB de RAM e {cpu}vCPU, o que deve ser suficiente para a maioria dos {appType}.
No entanto, se você estiver trabalhando em um projeto maior e precisar de mais estabilidade, recomendamos considerar nosso plano Pro.
Com recursos adicionais, você pode manter a estabilidade mesmo durante picos de demanda.
Para comprar, basta clicar aqui.
;
}
};
export const appType_0 = "a Telegram bots"
## はじめに
Square Cloud で {appType_0} を開発してホストするには、構成と前提条件の体系的な手順に従うことが不可欠です。この技術ガイドでは、初期セットアップから本番環境へのデプロイまで、プロセス全体を解説します。
### 前提条件
* **Square Cloud アカウント**: [登録ページ](https://squarecloud.app/ja/signup)からメールアドレスを使って登録します。
* **有効な有料プラン**: アプリケーションに専用リソースと最適化されたパフォーマンスを提供します。[利用可能なプラン](https://squarecloud.app/ja/pricing)を確認し、ニーズに最も適したものを選択してください。
## プロジェクトの作成
Telegram アカウントは、ボットのテストと操作に不可欠です。まだお持ちでない場合は、[Telegram 公式サイト](https://telegram.org/) にアクセスして無料でアカウントを作成してください。
### Telegram でのボットアプリケーション
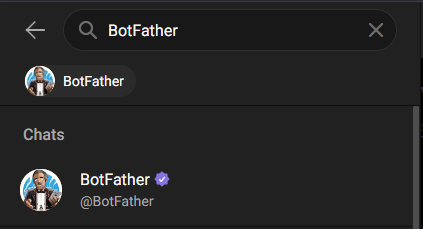
[Telegram Web](https://web.telegram.org/a/) にアクセスし、プラットフォーム上でボットの作成と管理を担当する公式の **BotFather** ボットを検索します。
 BotFather との会話を開始し、`/start` と入力します。次に、`/newbot` オプションを選択して新しいボットを作成します。システムがボットの名前を尋ね、確認後、必要な認証トークンが自動的に生成されます。
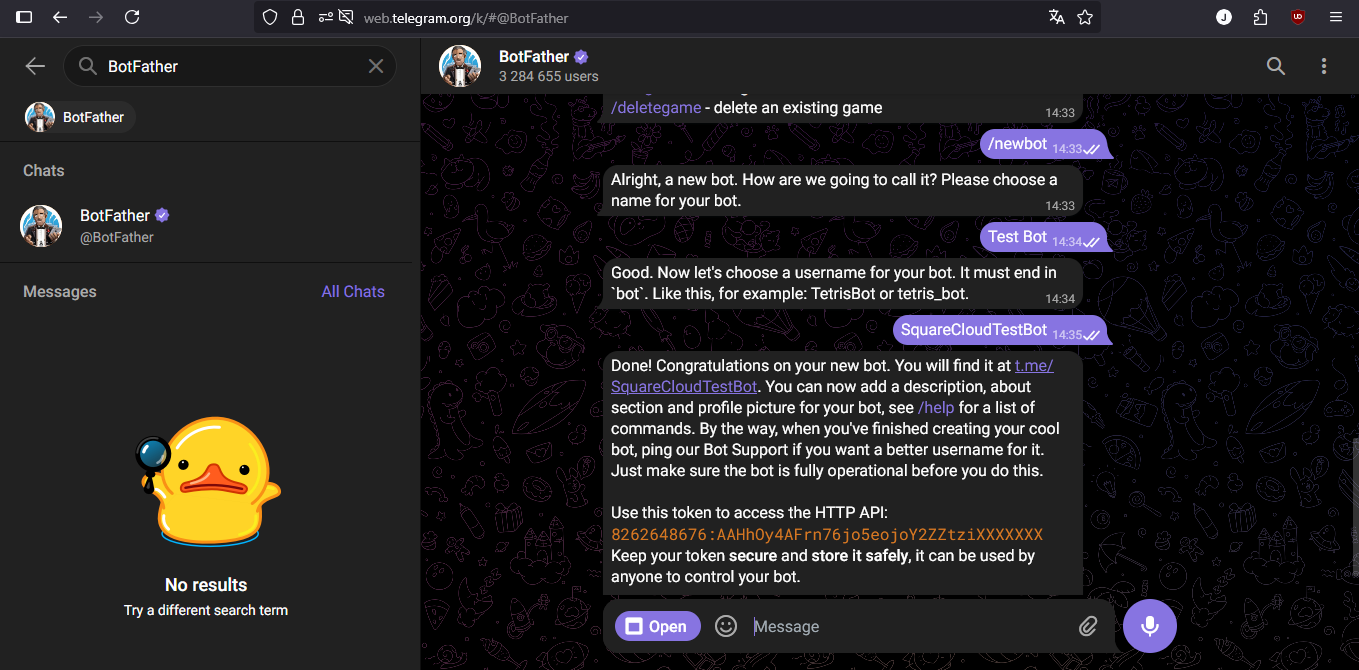 **重要なセキュリティ**: ボットのトークンは絶対に秘密にしてください。このトークンはボットの完全な制御権を与えるものであり、機密情報として扱う必要があります。
### プロジェクトの開発
ライブラリやフレームワークの選択は、使用するプログラミング言語によって異なります。以下は最も人気のある選択肢の一部です。
**環境のセットアップ**
1. システムに Node.js がインストールされていることを確認してください。まだの場合は、[Node.js 公式サイト](https://nodejs.org/) からダウンロードしてください。
2. 新しい Node.js プロジェクトを初期化します。
```bash Terminal theme={null}
npm init -y
```
3. grammY ライブラリをインストールします。
```bash Terminal theme={null}
npm install grammy
```
**基本的な実装**
4. 次の構造でメインファイル (`index.js`) を作成します。
```javascript index.js theme={null}
const { Bot } = require("grammy");
// Authentication token configuration
const token = "YOUR_TOKEN_HERE";
// Bot initialization
const bot = new Bot(token);
(async () => {
// Get bot information
const botInfo = await bot.api.getMe();
const botName = botInfo.username;
// Define handler for text messages
bot.on("message:text", async (ctx) => {
const userMsg = ctx.message.text;
const responseMsg = `${botName} responds: ${userMsg}`;
await ctx.reply(responseMsg);
});
// Start the bot
bot.start();
console.log(`Bot ${botName} started successfully!`);
})();
```
**環境のセットアップ**
1. Python と pip がインストールされていることを確認してください。まだの場合は、[Python 公式サイト](https://www.python.org/) からダウンロードしてください。
2. pyTelegramBotAPI ライブラリをインストールします。
```bash Terminal theme={null}
pip install pyTelegramBotAPI
```
**基本的な実装**
3. メインファイル (`main.py`) を作成します。
```python main.py theme={null}
import telebot
# Authentication token configuration
TOKEN = "YOUR_TOKEN_HERE"
# Bot initialization
bot = telebot.TeleBot(TOKEN)
# Define handler for non-command messages
@bot.message_handler(func=lambda message: not message.text.startswith('/'))
def echo_handler(message):
# Get bot information
bot_info = bot.get_me()
bot_name = bot_info.username
# Format response message
response_msg = f"{bot_name} responds: {message.text}"
# Reply to the user
bot.reply_to(message, response_msg)
# Main execution
if __name__ == '__main__':
bot_info = bot.get_me()
print(f"Bot {bot_info.username} started successfully!")
# Start polling
bot.infinity_polling()
```
4. 依存関係を管理するために `requirements.txt` ファイルを作成します。
```txt requirements.txt theme={null}
pyTelegramBotAPI
```
## デプロイ
プロジェクトファイルの準備ができたら、それらを Square Cloud にアップロードしてプロジェクトをホストできます。
そのためには、すべてのプロジェクトファイルを含む ZIP ファイルを作成してください。
### ダッシュボード経由
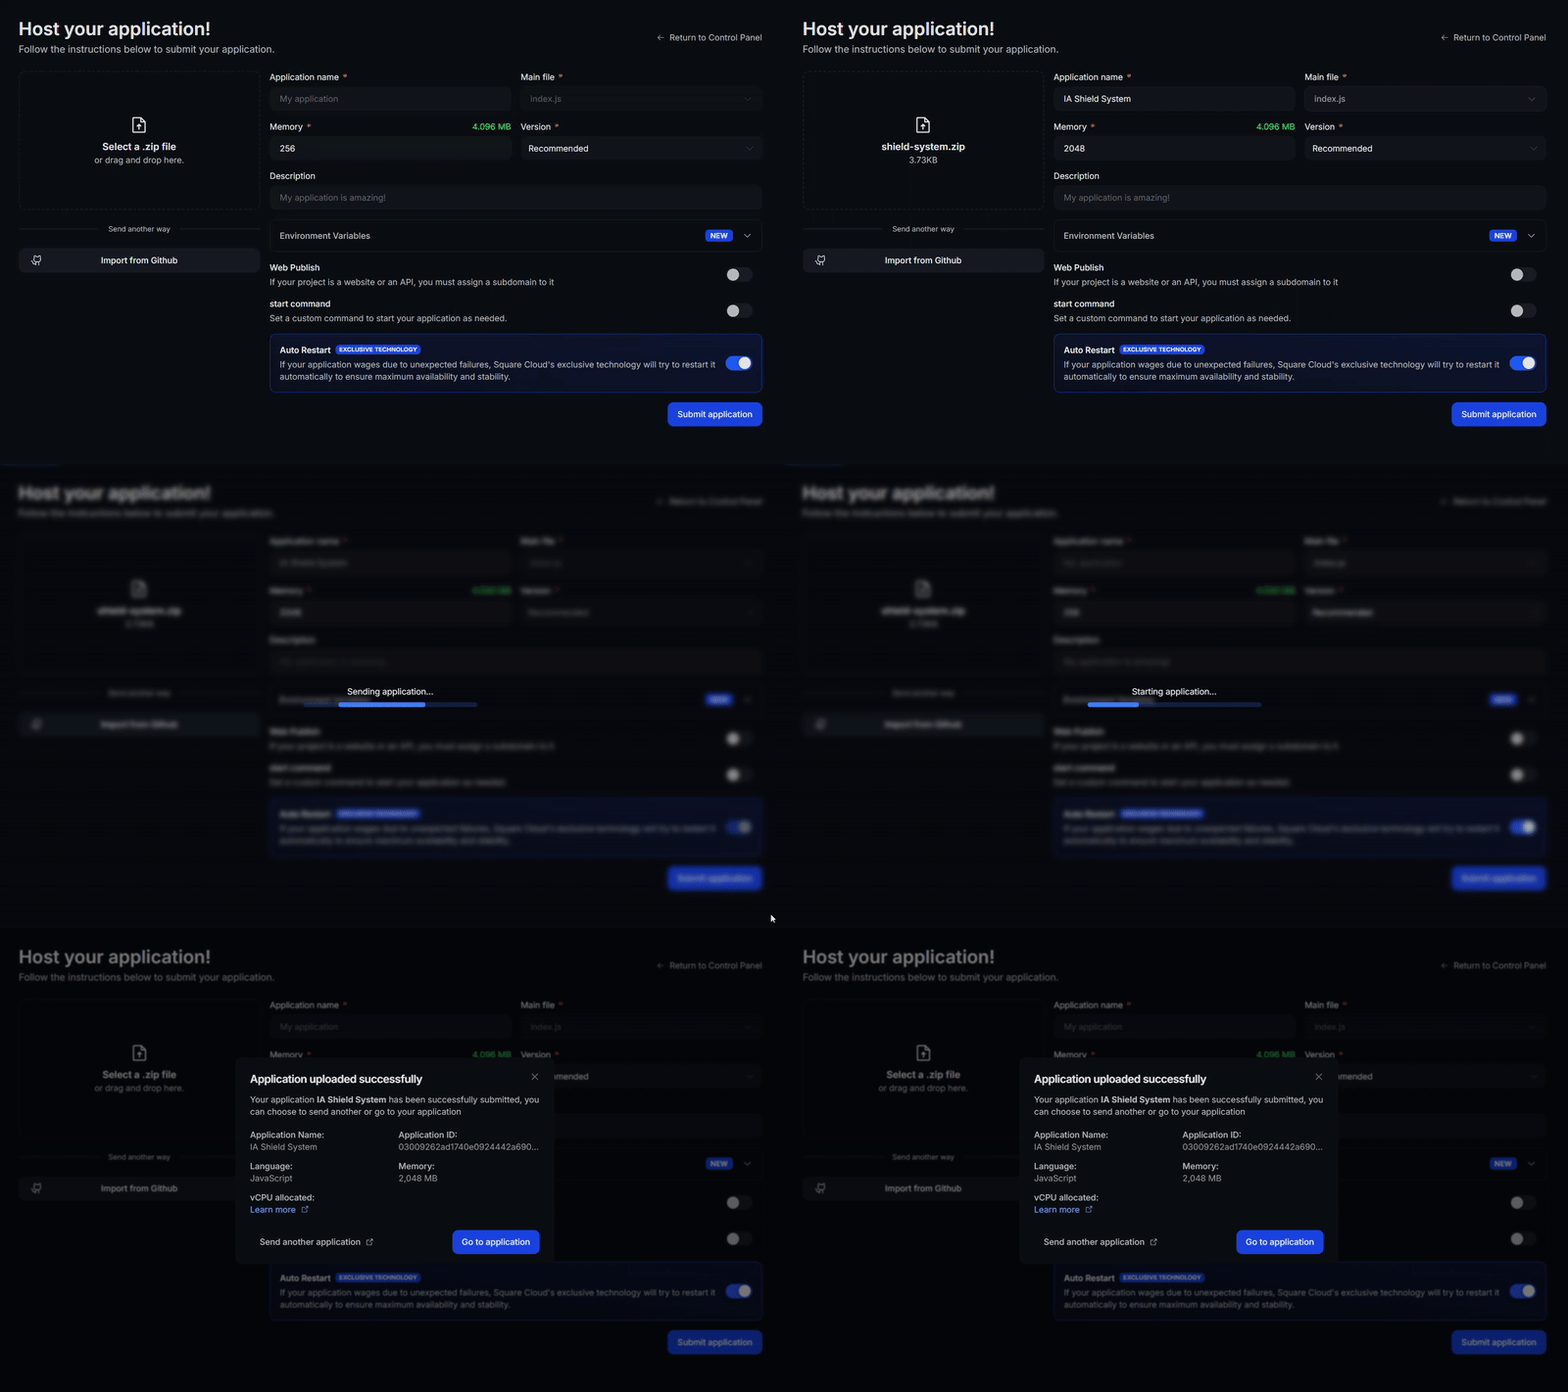
[アップロードページ](https://squarecloud.app/ja/dashboard/new)にアクセスし、プロジェクトの zip ファイルをアップロードします。
zip をアップロードした後、プロジェクトの名前、メインファイルまたはランタイム環境、その他の設定を構成する必要があります。\
ウェブプロジェクトをアップロードする場合は、必ず「Web Publication」を選択し、プロジェクトにサブドメインを設定してください。
最後に「Deploy」ボタンをクリックして、プロジェクトを Square Cloud にホストします。\
デプロイ後、ダッシュボードからプロジェクトのステータスとログを監視できます。
**重要なセキュリティ**: ボットのトークンは絶対に秘密にしてください。このトークンはボットの完全な制御権を与えるものであり、機密情報として扱う必要があります。
### プロジェクトの開発
ライブラリやフレームワークの選択は、使用するプログラミング言語によって異なります。以下は最も人気のある選択肢の一部です。
**環境のセットアップ**
1. システムに Node.js がインストールされていることを確認してください。まだの場合は、[Node.js 公式サイト](https://nodejs.org/) からダウンロードしてください。
2. 新しい Node.js プロジェクトを初期化します。
```bash Terminal theme={null}
npm init -y
```
3. grammY ライブラリをインストールします。
```bash Terminal theme={null}
npm install grammy
```
**基本的な実装**
4. 次の構造でメインファイル (`index.js`) を作成します。
```javascript index.js theme={null}
const { Bot } = require("grammy");
// Authentication token configuration
const token = "YOUR_TOKEN_HERE";
// Bot initialization
const bot = new Bot(token);
(async () => {
// Get bot information
const botInfo = await bot.api.getMe();
const botName = botInfo.username;
// Define handler for text messages
bot.on("message:text", async (ctx) => {
const userMsg = ctx.message.text;
const responseMsg = `${botName} responds: ${userMsg}`;
await ctx.reply(responseMsg);
});
// Start the bot
bot.start();
console.log(`Bot ${botName} started successfully!`);
})();
```
**環境のセットアップ**
1. Python と pip がインストールされていることを確認してください。まだの場合は、[Python 公式サイト](https://www.python.org/) からダウンロードしてください。
2. pyTelegramBotAPI ライブラリをインストールします。
```bash Terminal theme={null}
pip install pyTelegramBotAPI
```
**基本的な実装**
3. メインファイル (`main.py`) を作成します。
```python main.py theme={null}
import telebot
# Authentication token configuration
TOKEN = "YOUR_TOKEN_HERE"
# Bot initialization
bot = telebot.TeleBot(TOKEN)
# Define handler for non-command messages
@bot.message_handler(func=lambda message: not message.text.startswith('/'))
def echo_handler(message):
# Get bot information
bot_info = bot.get_me()
bot_name = bot_info.username
# Format response message
response_msg = f"{bot_name} responds: {message.text}"
# Reply to the user
bot.reply_to(message, response_msg)
# Main execution
if __name__ == '__main__':
bot_info = bot.get_me()
print(f"Bot {bot_info.username} started successfully!")
# Start polling
bot.infinity_polling()
```
4. 依存関係を管理するために `requirements.txt` ファイルを作成します。
```txt requirements.txt theme={null}
pyTelegramBotAPI
```
## デプロイ
プロジェクトファイルの準備ができたら、それらを Square Cloud にアップロードしてプロジェクトをホストできます。
そのためには、すべてのプロジェクトファイルを含む ZIP ファイルを作成してください。
### ダッシュボード経由
[アップロードページ](https://squarecloud.app/ja/dashboard/new)にアクセスし、プロジェクトの zip ファイルをアップロードします。
zip をアップロードした後、プロジェクトの名前、メインファイルまたはランタイム環境、その他の設定を構成する必要があります。\
ウェブプロジェクトをアップロードする場合は、必ず「Web Publication」を選択し、プロジェクトにサブドメインを設定してください。
最後に「Deploy」ボタンをクリックして、プロジェクトを Square Cloud にホストします。\
デプロイ後、ダッシュボードからプロジェクトのステータスとログを監視できます。
 ### CLI 経由
この方法を使用するには、プロジェクトのルートディレクトリに `squarecloud.app` という名前の設定ファイルを作成する必要があります。このファイルには、プロジェクトに必要な設定が含まれます。
squarecloud.app ファイルはアプリケーションを構成するために使用される設定ファイルであり、環境を定義するために使用されます。
まず、環境に CLI がインストールされている必要があります。まだの場合は、ターミナルで次のコマンドを実行してください:
```
npm install -g @squarecloud/cli
```
すでにお持ちの場合は、更新することを推奨します。更新するには、ターミナルで次のコマンドを実行してください:
```bash theme={null}
squarecloud update
```
```bash theme={null}
curl -fsSL https://cli.squarecloud.app/install | bash
```
次に、認証して他の CLI コマンドを使用するには、[こちら](https://squarecloud.app/ja/account/security)で「Request API Key」をクリックして認証キーを取得します。認証キーを取得したら、次のコマンドを実行してください:
```bash theme={null}
squarecloud auth login
```
最後に、CLI を使用してアプリケーションを Square Cloud にデプロイするには、次のコマンドを実行する必要があります:
```bash theme={null}
squarecloud upload
```
または、zip を手動で作成した場合は、次を使用できます:
```bash theme={null}
squarecloud upload --file
```
## ボットのテスト
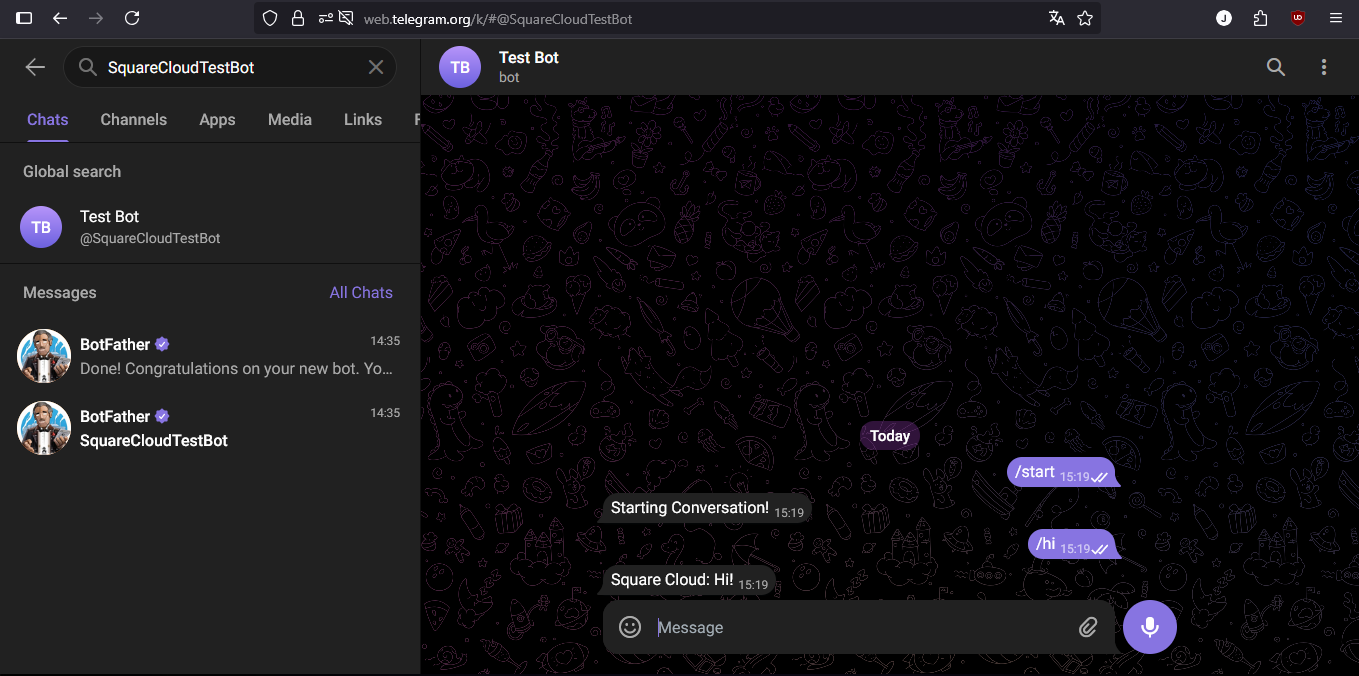
デプロイに成功したら、Telegram でボットを見つけてテストメッセージを送信します。ボットはあなたのメッセージをそのまま返すはずで、これにより実装が正しく機能していることが確認できます。
### CLI 経由
この方法を使用するには、プロジェクトのルートディレクトリに `squarecloud.app` という名前の設定ファイルを作成する必要があります。このファイルには、プロジェクトに必要な設定が含まれます。
squarecloud.app ファイルはアプリケーションを構成するために使用される設定ファイルであり、環境を定義するために使用されます。
まず、環境に CLI がインストールされている必要があります。まだの場合は、ターミナルで次のコマンドを実行してください:
```
npm install -g @squarecloud/cli
```
すでにお持ちの場合は、更新することを推奨します。更新するには、ターミナルで次のコマンドを実行してください:
```bash theme={null}
squarecloud update
```
```bash theme={null}
curl -fsSL https://cli.squarecloud.app/install | bash
```
次に、認証して他の CLI コマンドを使用するには、[こちら](https://squarecloud.app/ja/account/security)で「Request API Key」をクリックして認証キーを取得します。認証キーを取得したら、次のコマンドを実行してください:
```bash theme={null}
squarecloud auth login
```
最後に、CLI を使用してアプリケーションを Square Cloud にデプロイするには、次のコマンドを実行する必要があります:
```bash theme={null}
squarecloud upload
```
または、zip を手動で作成した場合は、次を使用できます:
```bash theme={null}
squarecloud upload --file
```
## ボットのテスト
デプロイに成功したら、Telegram でボットを見つけてテストメッセージを送信します。ボットはあなたのメッセージをそのまま返すはずで、これにより実装が正しく機能していることが確認できます。
 ## 追加リソース
Telegram ボット開発に関する知識を深めるには、[pyTelegramBotAPI 公式ドキュメント](https://pypi.org/project/pyTelegramBotAPI/) を参照してください。このドキュメントには、詳細なガイド、高度なチュートリアル、完全な API リファレンスが用意されています。
## お問い合わせ
**技術的な問題**が解決しない場合は、**専門のサポートチーム**がお手伝いします。[**お問い合わせ**](https://squarecloud.app/ja/support)いただければ、どのような問題でも喜んで解決をサポートいたします。
## 追加リソース
Telegram ボット開発に関する知識を深めるには、[pyTelegramBotAPI 公式ドキュメント](https://pypi.org/project/pyTelegramBotAPI/) を参照してください。このドキュメントには、詳細なガイド、高度なチュートリアル、完全な API リファレンスが用意されています。
## お問い合わせ
**技術的な問題**が解決しない場合は、**専門のサポートチーム**がお手伝いします。[**お問い合わせ**](https://squarecloud.app/ja/support)いただければ、どのような問題でも喜んで解決をサポートいたします。