> ## Documentation Index
> Fetch the complete documentation index at: https://docs.squarecloud.app/llms.txt
> Use this file to discover all available pages before exploring further.
# How to Set Up Your Custom Domain
> Learn how to configure your domain on Square Cloud
## Introduction
To configure your custom domain on Square Cloud, you need to have the **Standard** plan or higher. Since Square Cloud uses CNAME records for domain functionality, some registrars may not offer complete support for this configuration.
**Therefore, we strongly recommend using Cloudflare** as a DNS proxy, which offers full compatibility and advanced features for your domain.
## Registering a Domain
To use a custom domain on Square Cloud, you need to be the domain owner. This means you must register or already own a domain through a trusted domain registrar.
Choose the platform that best meets your needs and register your domain.
## Setting Up DNS on Cloudflare
* Access the website where you registered your domain.
* Then, go to [Cloudflare](https://cloudflare.com/), navigate to **Sites** and click **Add a site**.
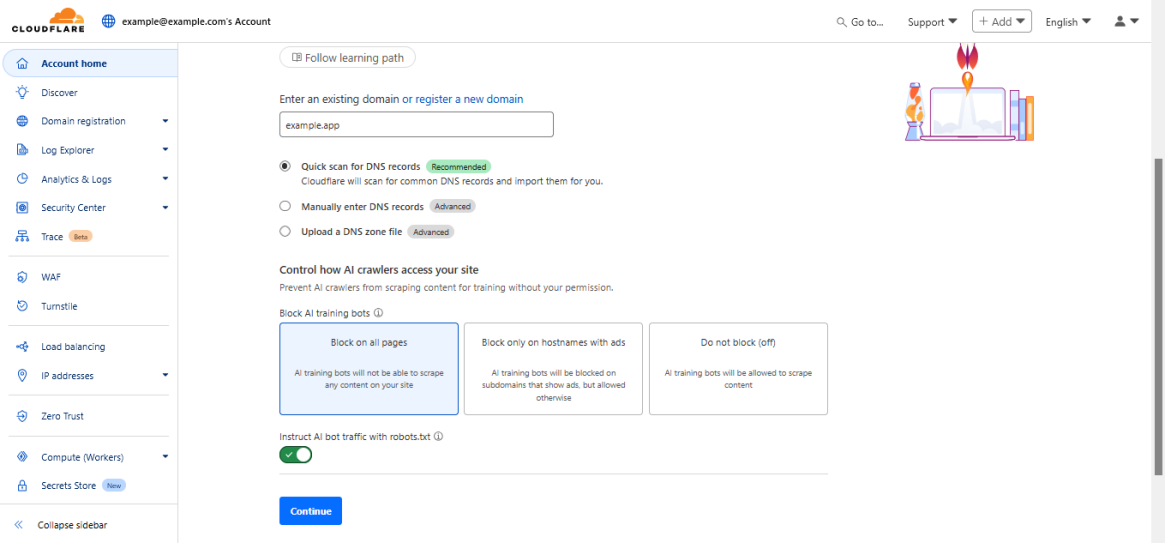 After entering your domain, copy the provided nameservers and paste them in the panel of the platform where you registered the domain, in the **DNS/Nameservers** section.
## Configuring Your Domain on Square Cloud
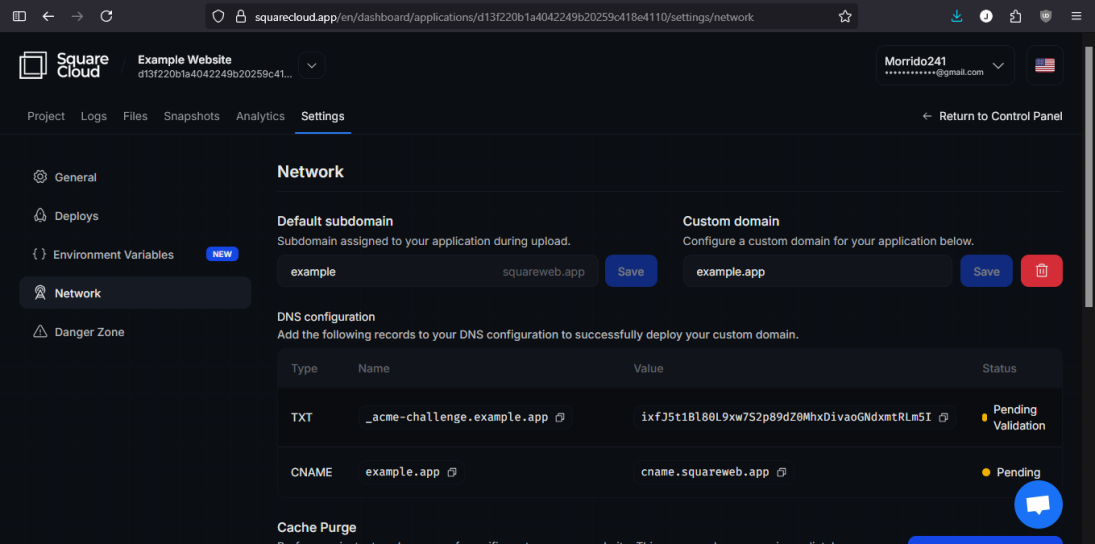
* In the [dashboard](https://squarecloud.app/en/dashboard), choose the site for which you want to configure the domain. Then, access **Settings** and replace "example.com" with your domain.
After entering your domain, copy the provided nameservers and paste them in the panel of the platform where you registered the domain, in the **DNS/Nameservers** section.
## Configuring Your Domain on Square Cloud
* In the [dashboard](https://squarecloud.app/en/dashboard), choose the site for which you want to configure the domain. Then, access **Settings** and replace "example.com" with your domain.
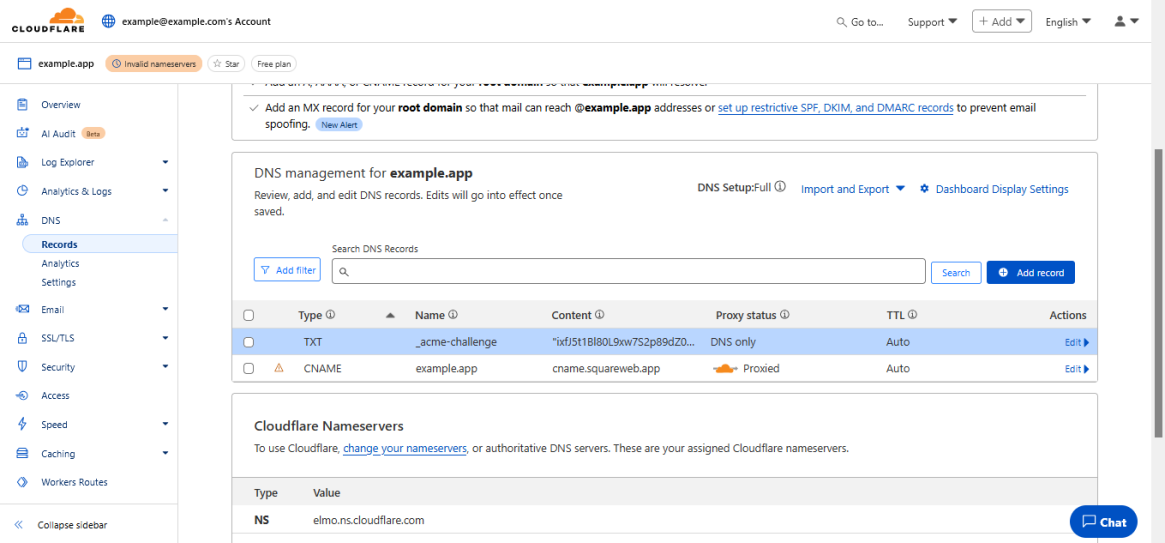
 * Now that the domain is registered on Square Cloud, return to Cloudflare, select your domain and access the **DNS** tab.
* Finally, create a **CNAME** record pointing to `cname.squareweb.app`, replacing the name with your subdomain, and another **TXT** record with the value displayed in **DNS Configuration** after saving.
* Now that the domain is registered on Square Cloud, return to Cloudflare, select your domain and access the **DNS** tab.
* Finally, create a **CNAME** record pointing to `cname.squareweb.app`, replacing the name with your subdomain, and another **TXT** record with the value displayed in **DNS Configuration** after saving.
 ## Important Tips
### Redirecting www to Your Domain
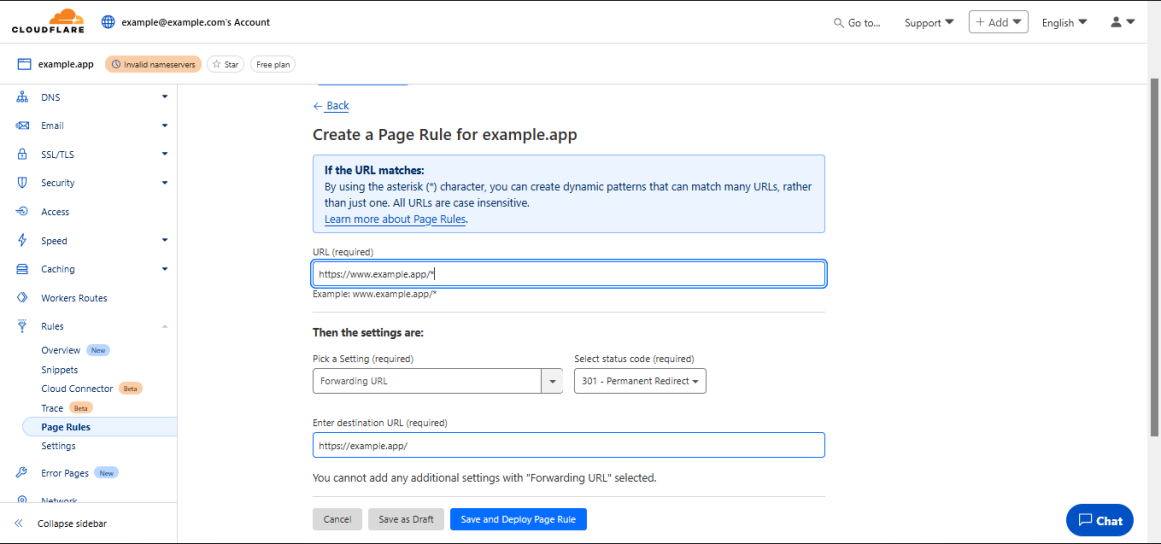
* To redirect `www` to your domain, create a new record with the name **www** and type **A**, pointing to `192.0.2.1` (placeholder IP — the request is proxied by Cloudflare, so the actual address doesn't matter).
* Then, in Cloudflare, access **Page Rules** and create a new rule with the settings shown below:
## Important Tips
### Redirecting www to Your Domain
* To redirect `www` to your domain, create a new record with the name **www** and type **A**, pointing to `192.0.2.1` (placeholder IP — the request is proxied by Cloudflare, so the actual address doesn't matter).
* Then, in Cloudflare, access **Page Rules** and create a new rule with the settings shown below:
 ### Troubleshooting
* If you receive the error **"Could not find this site."**, try clearing your browser cache and access the site again in 60 seconds.
### Troubleshooting
* If you receive the error **"Could not find this site."**, try clearing your browser cache and access the site again in 60 seconds.
 * If you receive the **Cloudflare 1015** error, it means your domain is not configured correctly. Check the configuration and make sure it is correctly pointed to Square Cloud. If you continue having problems, [contact our team](https://squarecloud.app/en/support).