> ## Documentation Index
> Fetch the complete documentation index at: https://docs.squarecloud.app/llms.txt
> Use this file to discover all available pages before exploring further.
# How to host your Uptime Kuma
> This tutorial will guide you to create and deploy your Uptime Kuma application on Square Cloud.
## Introduction
* This article guides you through creating and hosting an Uptime Kuma application on Square Cloud.
* Before getting started, make sure you have an account on Square Cloud, which can be done through the sign up page. You can use your email to create an account.
* Finally, you need to have an active paid plan on your account. You can view our plans and purchase one according to your needs [here](https://squarecloud.app/en/pricing).
## Choosing a version
* First, we need to choose a version available [here](https://github.com/squarecloud-education/uptimekuma-web/releases).
* Download the `project.zip` of the choosed version.
## Config file
* If you want a custom subdomain instead of a random hash, you can modify your squarecloud.config to set the desired subdomain.
```systemd squarecloud.config theme={null}
DISPLAY_NAME=Uptime Kuma
MEMORY=1024
VERSION=recommended
AUTORESTART=true
MAIN=server/server.js
SUBDOMAIN=my-uptime-kuma
```
You can also set this through the upload menu.
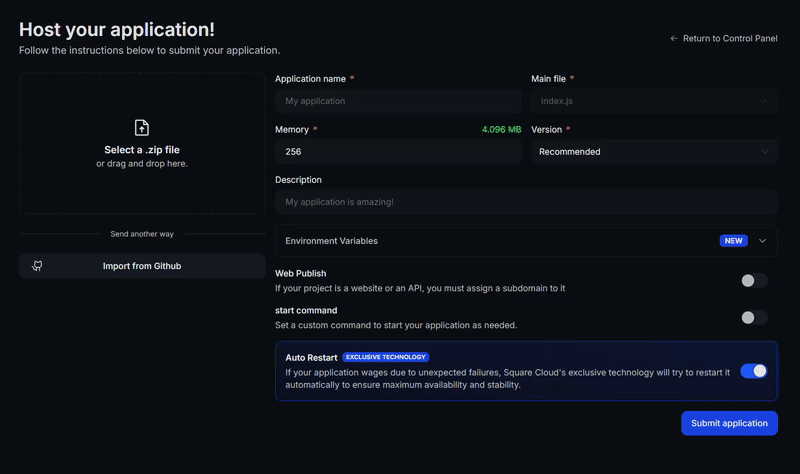
## Uploading the Project to Square Cloud
After preparing your project files, you can now upload them to Square Cloud and host your project.
Access the [Square Cloud Dashboard](https://squarecloud.app/en/dashboard/new) and upload your project files.
 First, you need to have the CLI installed in your environment. If you don't have it yet, run the following command in your terminal:
```
npm install -g @squarecloud/cli
```
If you already have it, we recommend updating it. To do this, run the following command in your terminal:
```bash theme={null}
squarecloud update
```
```bash theme={null}
curl -fsSL https://cli.squarecloud.app/install | bash
```
Now, to authenticate and use other CLI commands, you will find your authorization key [here](https://squarecloud.app/en/account/security) by clicking on "Request API Key". After obtaining your authorization key, run the following command:
```bash theme={null}
squarecloud auth login
```
Finally, to deploy your application to Square Cloud using the CLI, you need to run the following command, passing the path to your zip file:
```bash theme={null}
squarecloud upload zip
```
First, you need to have the CLI installed in your environment. If you don't have it yet, run the following command in your terminal:
```
npm install -g @squarecloud/cli
```
If you already have it, we recommend updating it. To do this, run the following command in your terminal:
```bash theme={null}
squarecloud update
```
```bash theme={null}
curl -fsSL https://cli.squarecloud.app/install | bash
```
Now, to authenticate and use other CLI commands, you will find your authorization key [here](https://squarecloud.app/en/account/security) by clicking on "Request API Key". After obtaining your authorization key, run the following command:
```bash theme={null}
squarecloud auth login
```
Finally, to deploy your application to Square Cloud using the CLI, you need to run the following command, passing the path to your zip file:
```bash theme={null}
squarecloud upload zip
```