> ## Documentation Index
> Fetch the complete documentation index at: https://docs.squarecloud.app/llms.txt
> Use this file to discover all available pages before exploring further.
# How to deploy your PG Admin
> Learn how to host your pgadmin to access your PostGreSQL database anywhere
## Introduction
* This article guides you through creating and hosting a PG Admin application on Square Cloud.
* Before getting started, make sure you have an account on Square Cloud, which can be done through the sign up page. You can use your email to create an account.
* Finally, you need to have an active paid plan on your account. You can view our plans and purchase one according to your needs [here](https://squarecloud.app/en/pricing).
## Creating the Project
* First of all we need an Python environment. To do this, we need a `requirements.txt` or a `pyproject.toml`.
You can see how to create a requirements.txt [here](https://docs.squarecloud.app/en/articles/how-to-create-your-requirements).
* Your `requirements.txt` must have `pgadmin4` and a webserver to serve it. In this tutorial, we will use `gunicorn`.
```txt requirements.txt theme={null}
pgadmin4
gunicorn
```
* Next, you will need a config file `config_local.py` to set some paths. These paths will define where to save some infos about your pgadmin.
```py config_local.py theme={null}
SERVER_MODE = True
MAX_LOGIN_ATTEMPTS = 3
"""
CRITICAL 50
ERROR 40
WARNING 30
SQL 25
INFO 20
DEBUG 10
NOTSET 0
"""
CONSOLE_LOG_LEVEL = 10
DATA_DIR = "/application/.pgadmin/"
LOG_FILE = "/application/.pgadmin/logfile"
SQLITE_PATH = '/application/.pgadmin/pgadmin4.db'
```
We already have everything ready for deploy on our repository [here](https://github.com/squarecloud-education/pgadmin4-web/releases). You just need to download the `project.zip` and upload it.
## 📁 Necessary Files
The following files are necessary in your zip:
* requirements.txt or pyproject.toml
* .env (optional)
## ⚙️ Configuration File
* You need to configure runtime environment to `Detect manually` and set it to `Python`. In a squarecloud.config or squarecloud.app will look like this:
```systemd squarecloud theme={null}
DISPLAY_NAME=App name
RUNTIME=python
MEMORY=1024
START=python -m gunicorn --bind 0.0.0.0:80 --workers=1 --threads=4 pgadmin4.pgAdmin4:app
VERSION=recommended
SUBDOMAIN=my-pgadmin-subdomain
```
* Next, we need to set 2 environment variables, `PGADMIN_SETUP_EMAIL` and `PGADMIN_SETUP_PASSWORD` in a `.env` file or in the Square Cloud environment on the upload menu.
```systemd .env theme={null}
PGADMIN_SETUP_EMAIL=accessemail@example.com
PGADMIN_SETUP_PASSWORD=yourSecurePassword
```
## Uploading the Project to Square Cloud
After preparing your project files, you can now upload them to Square Cloud and host your project.
Access the [Square Cloud Dashboard](https://squarecloud.app/en/dashboard/new) and upload your project files.
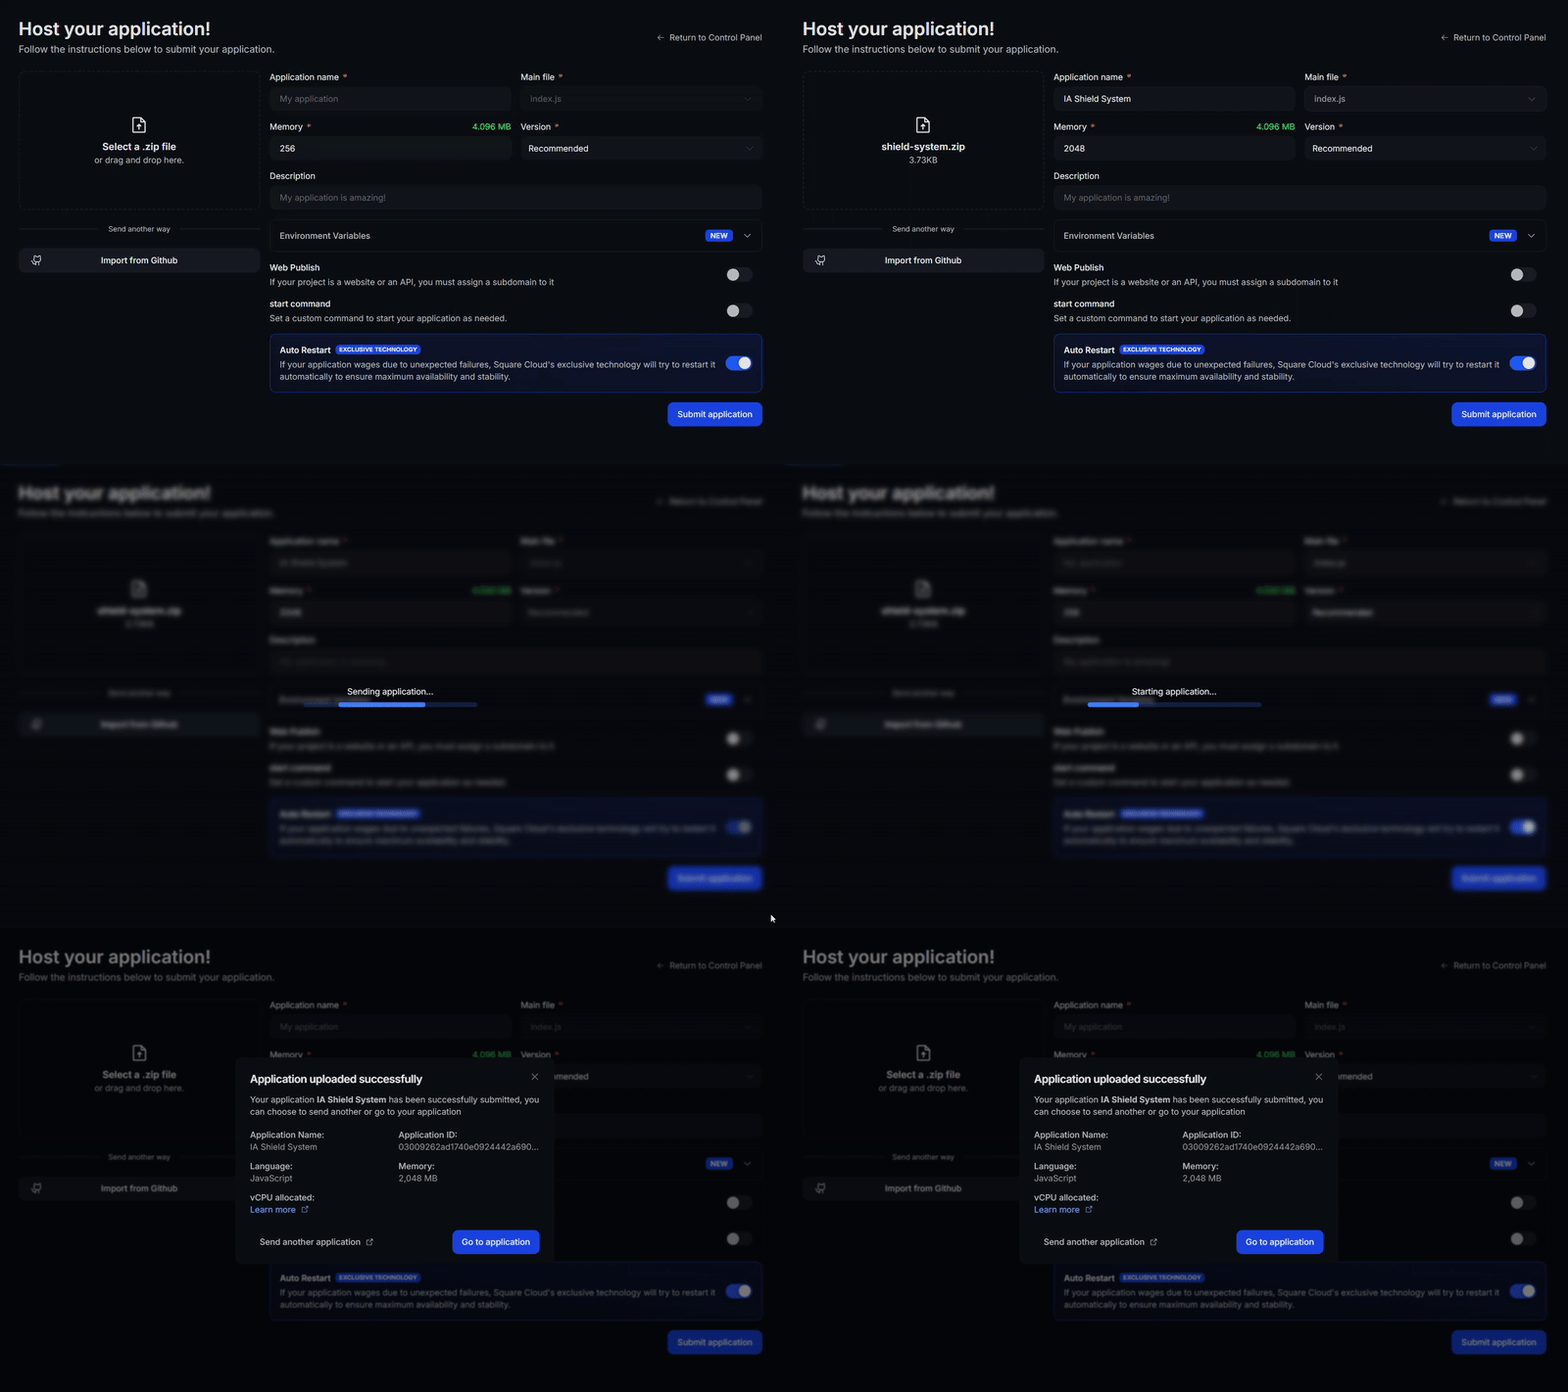 First, you need to have the CLI installed in your environment. If you don't have it yet, run the following command in your terminal:
```
npm install -g @squarecloud/cli
```
If you already have it, we recommend updating it. To do this, run the following command in your terminal:
```bash theme={null}
squarecloud update
```
```bash theme={null}
curl -fsSL https://cli.squarecloud.app/install | bash
```
Now, to authenticate and use other CLI commands, you will find your authorization key [here](https://squarecloud.app/en/account/security) by clicking on "Request API Key". After obtaining your authorization key, run the following command:
```bash theme={null}
squarecloud auth login
```
Finally, to deploy your application to Square Cloud using the CLI, you need to run the following command, passing the path to your zip file:
```bash theme={null}
squarecloud upload zip
```
First, you need to have the CLI installed in your environment. If you don't have it yet, run the following command in your terminal:
```
npm install -g @squarecloud/cli
```
If you already have it, we recommend updating it. To do this, run the following command in your terminal:
```bash theme={null}
squarecloud update
```
```bash theme={null}
curl -fsSL https://cli.squarecloud.app/install | bash
```
Now, to authenticate and use other CLI commands, you will find your authorization key [here](https://squarecloud.app/en/account/security) by clicking on "Request API Key". After obtaining your authorization key, run the following command:
```bash theme={null}
squarecloud auth login
```
Finally, to deploy your application to Square Cloud using the CLI, you need to run the following command, passing the path to your zip file:
```bash theme={null}
squarecloud upload zip
```