> ## Documentation Index
> Fetch the complete documentation index at: https://docs.squarecloud.app/llms.txt
> Use this file to discover all available pages before exploring further.
# Getting Started on Square Cloud with HTML/CSS
> Learn how to get started on Square Cloud with HTML/CSS
## 🚀 Introduction
* Before getting started, ensure you have a suitable text editor to create HTML and CSS files. We recommend [Visual Studio Code](https://code.visualstudio.com/) or any other editor of your preference.
* Next, you will need to create an account on Square Cloud, which can be done through the [login page](https://squarecloud.app/en/signup). You can use your email, GitHub, or both to create the account.
* Finally, you need to have an active paid plan on your account. You can view our plans and purchase one according to your needs [here](https://squarecloud.app/en/pricing).
Square Cloud offers native support for static projects, such as HTML/CSS sites. This means you can easily host your HTML, CSS, and other static resources on the platform. With integrated premium CDN, your sites will be delivered quickly to users worldwide.
If you are uploading your application via the Square Cloud website, you can ignore the section below. The site automatically creates the `squarecloud.app` configuration file for you.
## 📄 Required Files
* index.html (Example of main file).
* vite.html (Example of main file for Vite projects).
* 404.html (404 error routing file, optional).
## 🖥️ Preparing the project
Before hosting your project on Square Cloud, first check if the project files are properly configured for hosting.
## 📤 How to host your project
Now that you have prepared all the files for your HTML/CSS project, the next step is to upload them to Square Cloud and put your application online. There are several ways to upload, but we will cover two: via Dashboard or via CLI.
### Via dashboard
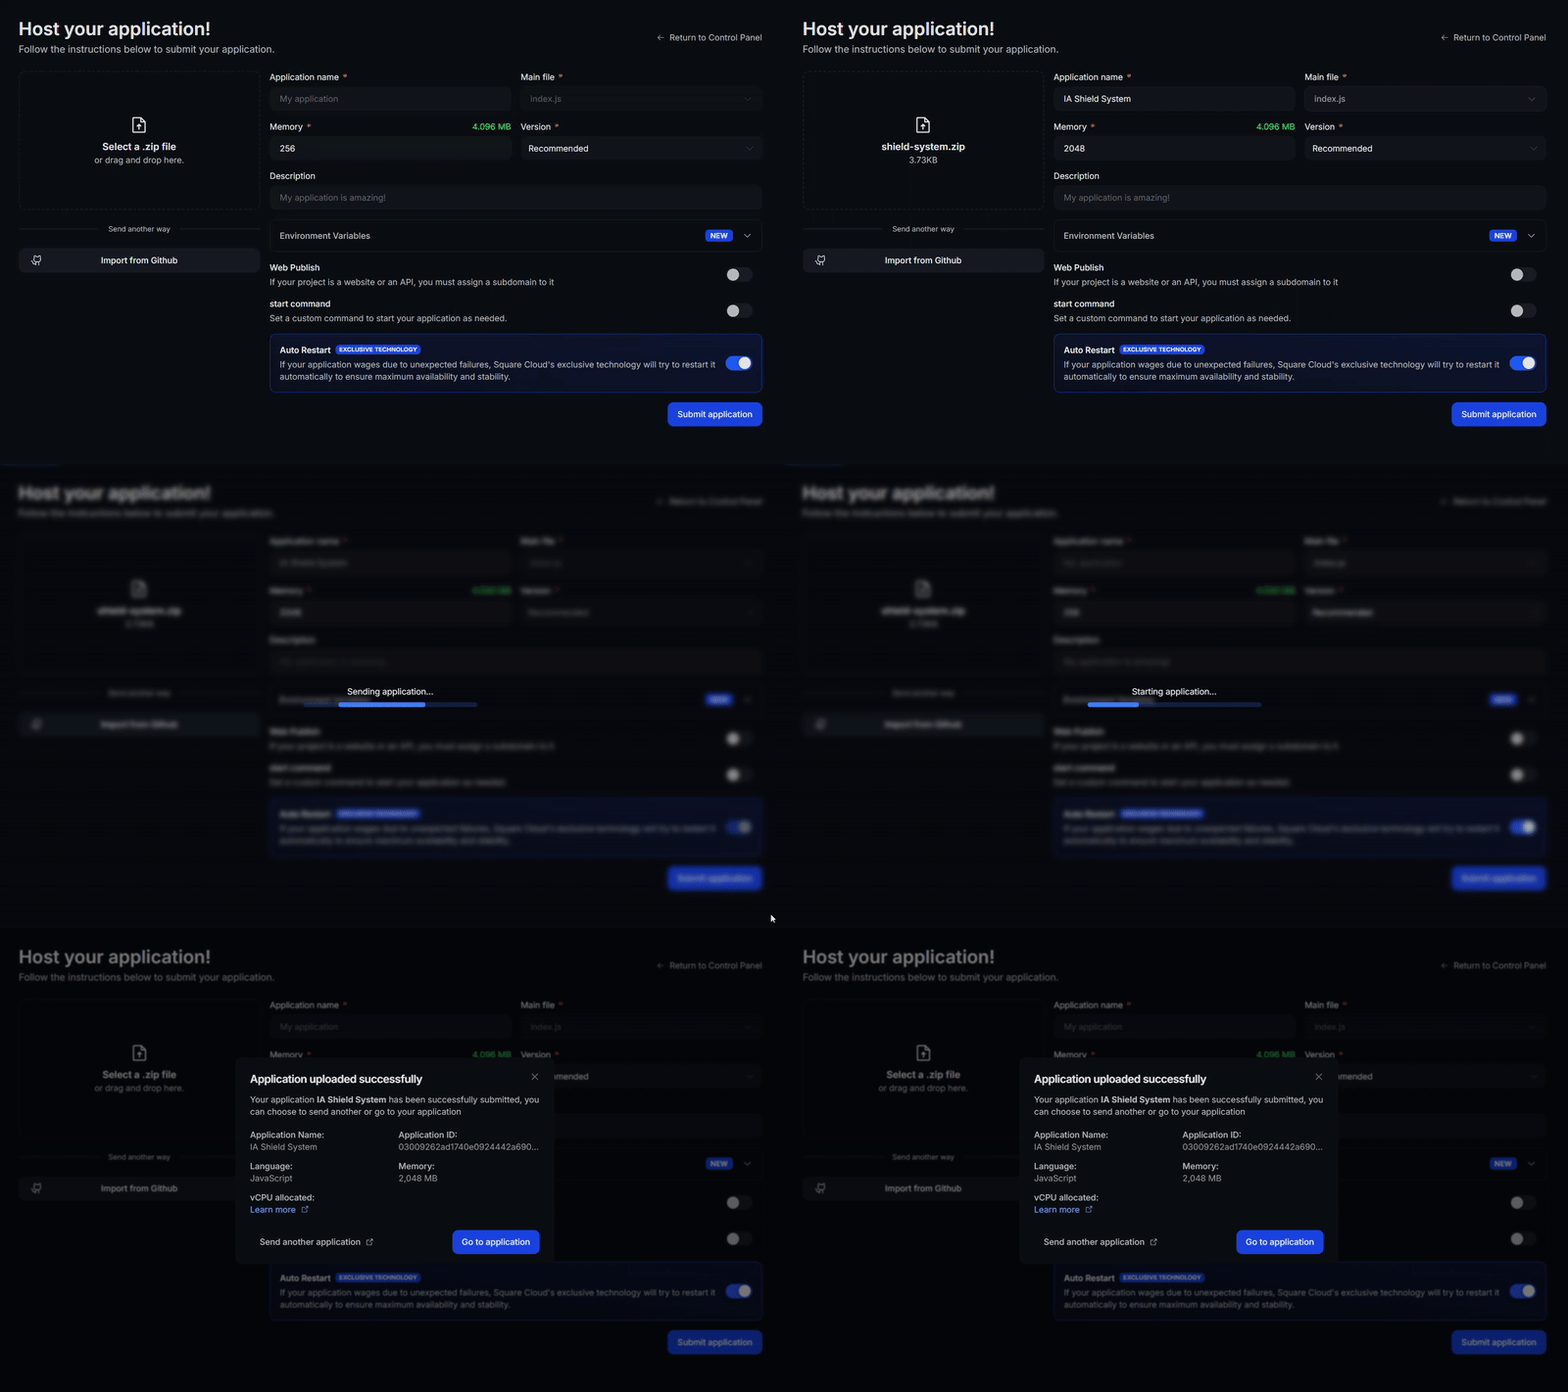
Access the [upload page](https://squarecloud.app/en/dashboard/new) and upload your project zip file.
After uploading your zip, you will need to configure the name, main file or runtime environment and other settings for your project.\
If you are uploading a web project, make sure to select "Web Publication" and set a subdomain to your project.
Finally, click on the "Deploy" button to host your project on Square Cloud.\
After deployment, you can monitor your project's status and logs from the dashboard.
 ### Via CLI
To use this method, you need to create a config file named `squarecloud.app` in the root directory of your project. This file will contain the necessary configuration for your project.
The squarecloud.app file is a configuration file that will be used to configure your application; it will be used to define your environment.
First, you need to have the CLI installed in your environment. If you don't have it yet, run the following command in your terminal:
```
npm install -g @squarecloud/cli
```
If you already have it, we recommend updating it. To do this, run the following command in your terminal:
```bash theme={null}
squarecloud update
```
```bash theme={null}
curl -fsSL https://cli.squarecloud.app/install | bash
```
Now, to authenticate and use other CLI commands, you will find your authorization key [here](https://squarecloud.app/en/account/security) by clicking on "Request API Key". After obtaining your authorization key, run the following command:
```bash theme={null}
squarecloud auth login
```
Finally, to deploy your application to Square Cloud using the CLI, you need to run the following command:
```bash theme={null}
squarecloud upload
```
Or if you created the zip manually, you can use:
```bash theme={null}
squarecloud upload --file
```
## Contact us
If you continue facing **technical difficulties**, our **specialized support team** is available to assist you. [**Contact us**](https://squarecloud.app/en/support) and we'll be happy to help you resolve any issue.
### Via CLI
To use this method, you need to create a config file named `squarecloud.app` in the root directory of your project. This file will contain the necessary configuration for your project.
The squarecloud.app file is a configuration file that will be used to configure your application; it will be used to define your environment.
First, you need to have the CLI installed in your environment. If you don't have it yet, run the following command in your terminal:
```
npm install -g @squarecloud/cli
```
If you already have it, we recommend updating it. To do this, run the following command in your terminal:
```bash theme={null}
squarecloud update
```
```bash theme={null}
curl -fsSL https://cli.squarecloud.app/install | bash
```
Now, to authenticate and use other CLI commands, you will find your authorization key [here](https://squarecloud.app/en/account/security) by clicking on "Request API Key". After obtaining your authorization key, run the following command:
```bash theme={null}
squarecloud auth login
```
Finally, to deploy your application to Square Cloud using the CLI, you need to run the following command:
```bash theme={null}
squarecloud upload
```
Or if you created the zip manually, you can use:
```bash theme={null}
squarecloud upload --file
```
## Contact us
If you continue facing **technical difficulties**, our **specialized support team** is available to assist you. [**Contact us**](https://squarecloud.app/en/support) and we'll be happy to help you resolve any issue.